Ray Tracer implementation in C++, Random Sample AA, multi-threading, bvh acceleration, temporal denoising, soft shadows, and runtime comparisons on different CPUs
Described in this README and the code in this repo is a personal project on a basic raytracing implementation. Added features on top of the basic ray tracer include random sample per pixel anti-aliasing, multithreading support, a bvh acceleration structure, temporal denoising, and soft shadows. I described the features of the ray-tracer and included a performance report of multithreading the ray tracer on three different Intel processors.
I also wrote a GPU accelerated implementation of a ray tracer located here https://github.com/boonemiller/CudaRayTracer
I implemented standard phong shading in the ray tracer, look at reference 3. Used the following formula for the shading
Ambient * Ka + Distance attenuation * Shadow attenuation * sum across lights(diffuseKd + SpecularKs) + Kr*Results of Secondary rays
Where Ka, Kd, Ks, and Kr are all constants that change for each object.
Ambient- the inherent color of the object
Diffuse- a color that changes intensity with the direction of the surface.
Specular- highlights, only show up if there is a particular angle between a reflected light ray and the camera
Distance Attenuation- how the distance from the light source affects the intensity of the light
Shadow Attenuation- if a point in the scene is in shadow or not
Point lights- a particular point in space that is emitting light. Has a color and terms that affect the Distance Attenuation
Directional Lights - a light that comes from an infinite location and only has a direction and color.
Bounce Depth- number of ray bounces we perform.
The ray tracer starts by casting rays from the location of the camera through each pixel. This initial ray is called the primary ray. In my implementation, the ray tracer first tests a primary ray through each pixel to see if it intersects any of the spheres in the scene. If it does, this is called an intersection point to be used later when casting secondary rays and shadow rays. If it doesn’t intersect any of the spheres, we know that it intersects one of the walls, defined as oriented planes within the space. The ray-plane intersection tests finds which plane it intersects and finds an intersection point for that plane.
At the intersection point, either a sphere or a plane intersection point, we can get the initial ambient color of the object. From the intersection point we can cast secondary and shadow rays.
At each intersection point, we need to see if that point is in shadow or not. To do this we cast another ray from the intersection point in the direction of each light. If we intersect any of the spheres we know that it is in shadow and the light doesn’t contribute anything to the color of the intersection point.
If it isn’t in shadow for any particular light than the light contributes its color, a diffuse, and specular term. For a point light we have to determine how far away this light is and take it into account.
For in-shadow intersection points, shadow attenuation is 0, for out of shadow intersection points shadow attenuation is 1.
For out of shadow intersection points we can also calculate the distance attenuation. Directional lights- our distance attenuation is always 1. Point Lights- our distance attenuation is 1/(ConstantTerm + distance*LinearTerm + (distance^2) * QuadraticTerm)
Now from the initial intersection point, we can cast secondary rays from the intersection point, based on the incoming vector and the intersection normal. We treat these rays the same way we treated the initial casted primary rays, testing the sphere intersections first, then the wall intersections. We repeat this process bounce depth of times.
After we have reached our bounce depth we return the value calculated from the phong shading equation listed above.
To add anti-aliasing into the process described above. Instead of only casting one primary ray through the center of the pixel. We casts some number of primary rays through each pixel at random locations and average the results returned by each of these rays. The results can be seen around the edges of the objects and at the intersection of the walls, and causes them to be smoother and not appear as jagged. This is because if an edge of an object passes through a pixel and we sample the part of pixel that it isn’t in, we don’t get the contribution of the object in the pixel. Random sample anti-aliasing increases the chance of an intersection and including the result of the edge in the pixel.
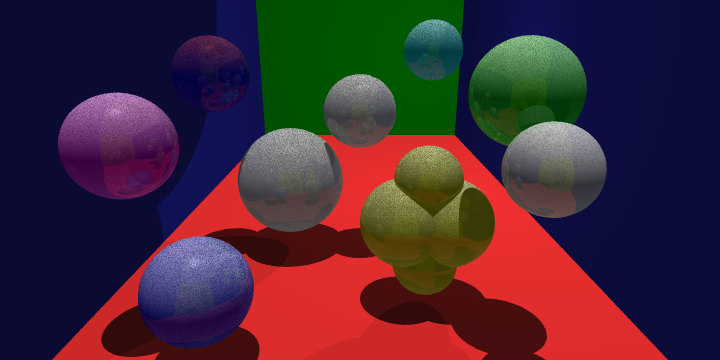
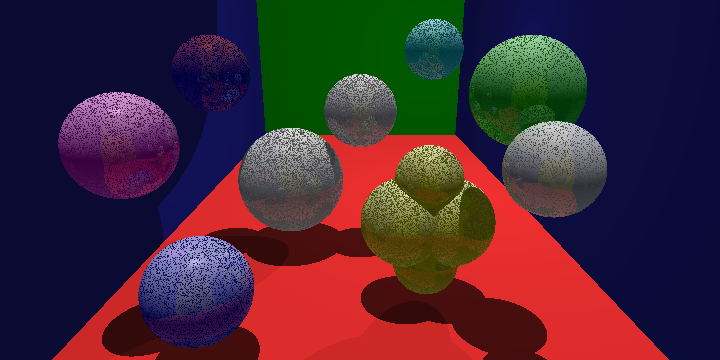
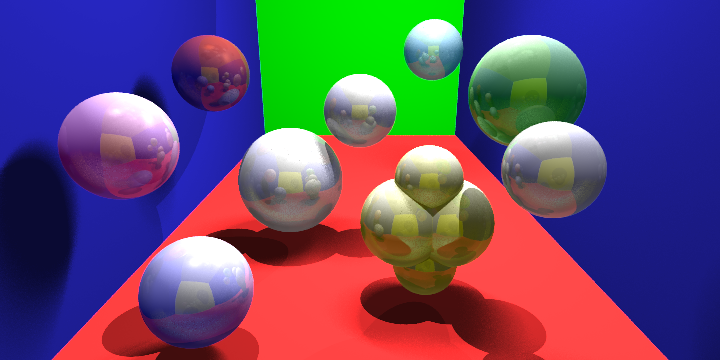
Scene with 16 Random samples per pixel (top image), AA-Off one sample per pixel (bottom image)
Noise is a common problem in ray tracers which is why there are plenty of methods to reduce noise in rendered scenes. The only method I implemented was anti-aliasing as described above, and temporal denoising described later. As you can see in the pictures, rendering with anti-aliasing(top image) reduced the noise present in the one sample per pixel render (bottom image).
Adding multithreading support is fairly simple. Ray tracers are known to be embarrassingly parallel. I used p-threads and divided up the frame into chunks of work based on the width. For example our 720x360 frame across two threads gets divided up into two 360X360 vertical chunks. And I extended this to 4, 6, and 8 threads if the processor could handle it for the performance profiling across different processors.
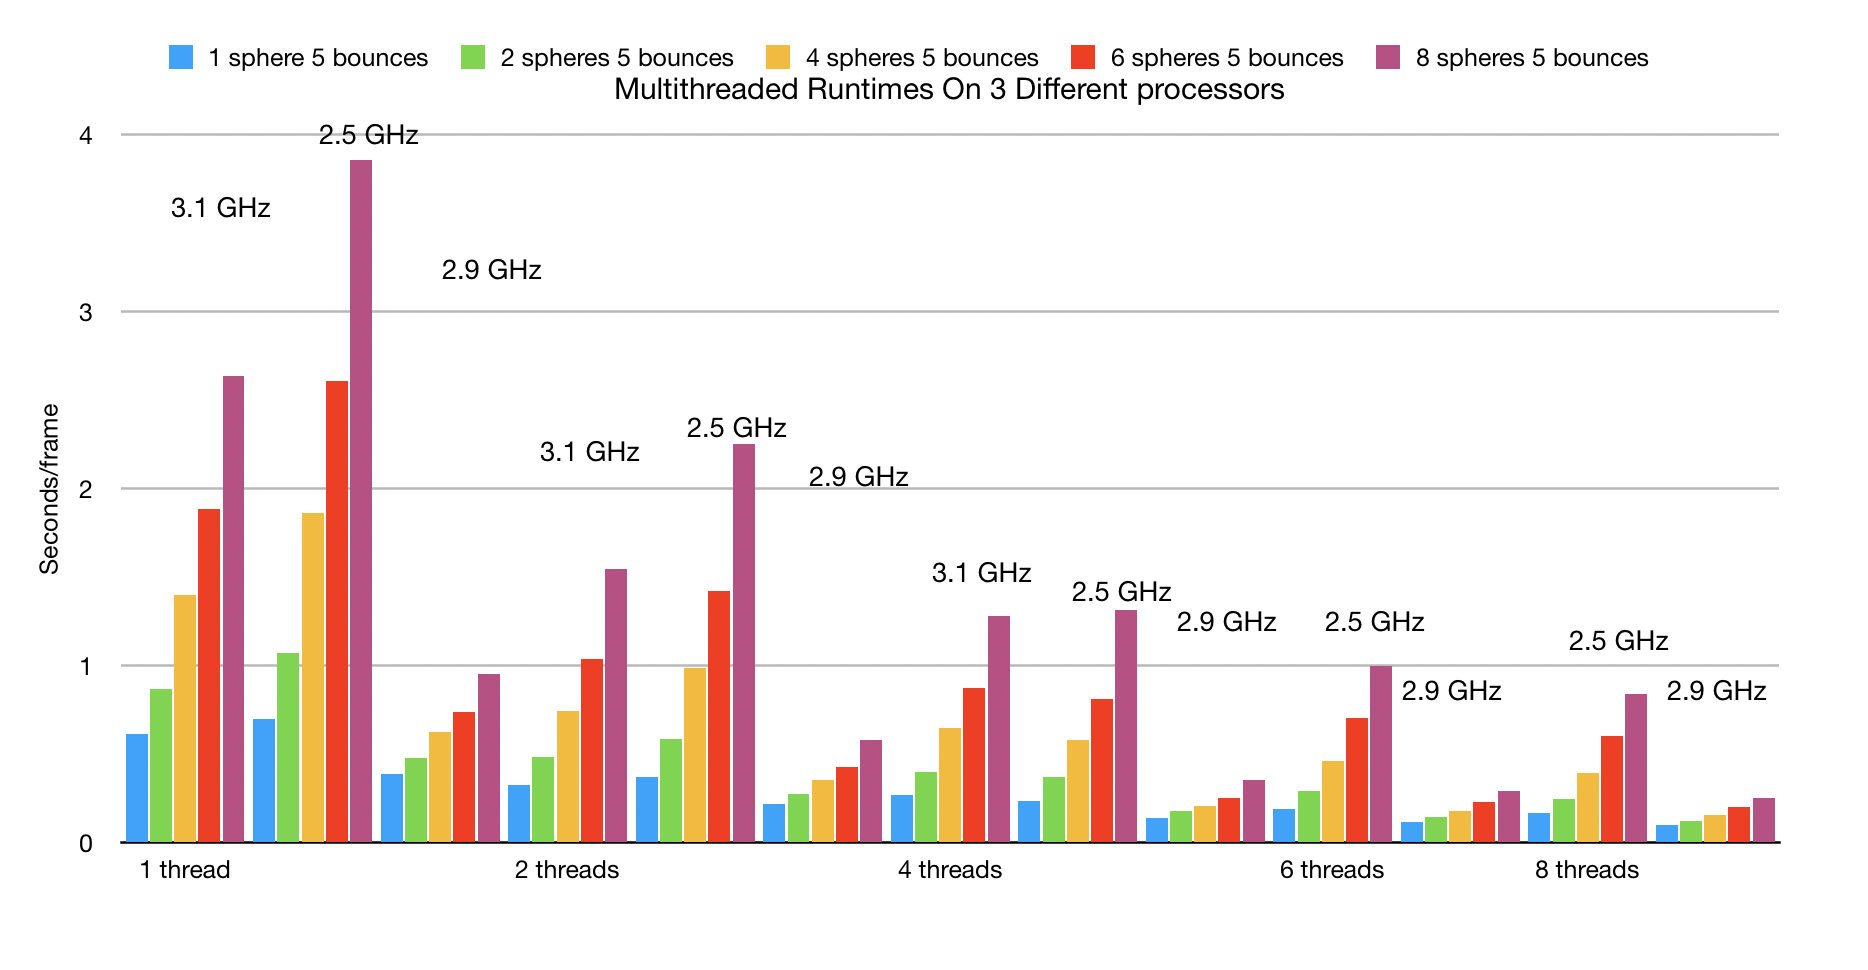
I ran the above scenes raytracing code on three different Intel processors. A intel dual-core 3.1 GHz i5, a 2.5 GHz quad-core i7, and a 2.9 Ghz quad-core i7. Rather unsurprisingly the results are what should be expected. The 3.1 GHz i5 beat out the 2.5 GHz i7 on single and double threaded runs, but starts to lose starting with 3 threads. And the 2.9 GHz i7 was faster than both of the other processors on every run.
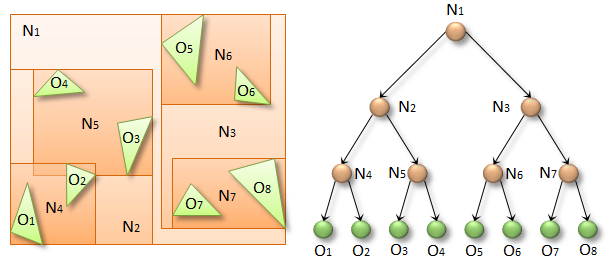
I implemented a BVH tree acceleration structure to decrease the number of object intersection tests needed for each ray casted. The basic process for this is that a ray traveling through a scene will only get close enough to a few objects and mostly miss all of the other objects. So in order to decrease the amount of these intersection tests for the missed objects. I create bounding boxes around some number of the objects. If the ray intersects a box then it is possible that it will intersect the objects inside the box. If it doesn’t intersect the bounding box then it can't intersect any of the objects within the box. I make a tree out of these bounding boxes where the root represents the whole scene’s bounding box, and each node represents some smaller bounding box with some subset of the objects. I stop building the tree when I get to a small number of objects within a bounding box, I said 3 or less, these represent the leaves of the tree.
So now when a ray is traveling through a scene, I test whether or not the ray intersects any of the bounding boxes that represent the objects. If it intersects any of the leaf bounding boxes I can tests only those objects (3 or less), instead of the entire scene.
BVH trees can also increase cache performance of primary rays. This happens as a side effect of casting rays in one area consecutively. For example if we cast a primary ray in one pixel, and then cast a primary ray in the pixel next to it, it is likely that the two pixels will be accessing the same parts of the BVH tree and as a result the objects needed for the object intersection tests will likely already be in the cache. Increasing caching with secondary rays is significantly more difficult, one way you could do this is to sort rays that are traveling in the same direction and then process them together, I didn’t add support for this in my ray tracer.
This is an example of how the tree might look if you used one object per leaf (taken from nvidia).
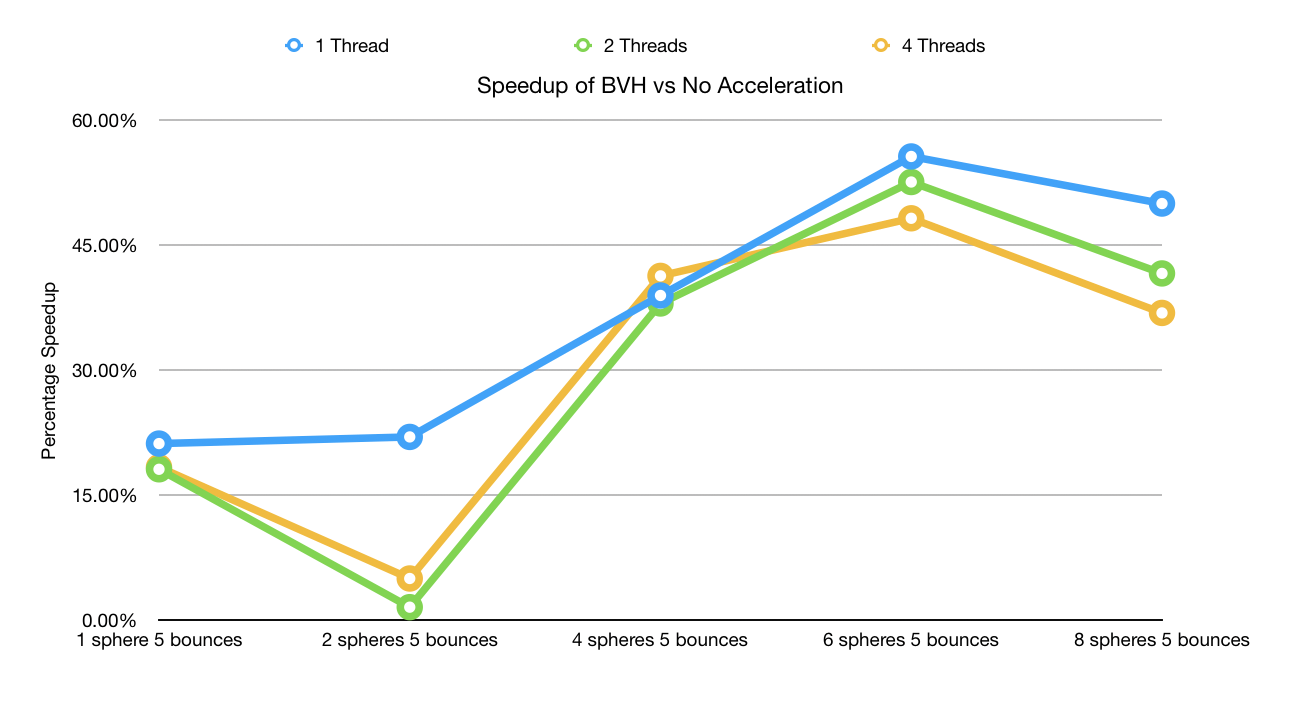
Graph of the speed ups achieved by adding a bvh acceleration structure into my raytracing code. This shows the percentage speed up of using a bvh acceleration structure over no acceleration structure at all, on a variety of scenes.
I attempted to denoise my ray traced scene by using historical pixel data. I ray trace the scene 60 times, and each time I render the frame, I look at an individual pixels history. If the pixel contained noise in an old frame but a good value in the new frame, we take the good value. I do this by simply taking the max of an old frame and the new rendered frame. I can do this because all of our noise values are black, or (0,0,0) rbg and any good frame would be greater than those values.
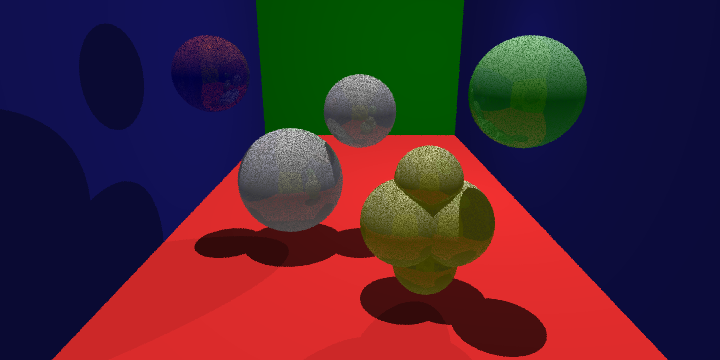
The scene above is rendered using 4 samples per pixel and using historical pixel data to denoise the scene. It appears to have less noise than the 16 samples per pixel render in the Random Sample Anti-Aliasing section.
Area lights are significantly more challenging theoretically than point or directional lights. Instead of light just originating from either a singularity or in a direction from infinitely far away. We have light being emitted in all directions from the emitting side of an object, in our case one side of a disk. In order to be able to tell if a particular point in the scene is in shadow from this area light, we would need to sample all possible points on the light source from our intersection point. Since this is not computationally reasonable, I am going to borrow an idea from Monte Carlo estimation. Monte Carlo estimation (which is used in more advanced renderers) basically says we can approximate an integral of a function by using random samples. So we take what would be a normal integral in the BDRF (simplified a lot by using phong shading) and approximate the integral of the sample point using random samples from the area light. Essentially what I did was take the sum across different random light samples, and then average it using the number of samples. This creates the ability to make soft shadows using area lights.
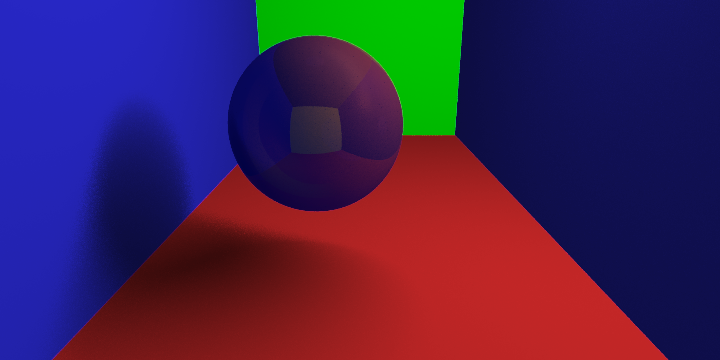
The above image was created using 4 samples per pixel with 30 light samples per intersection point, and ran 60 times to denoise the scene.
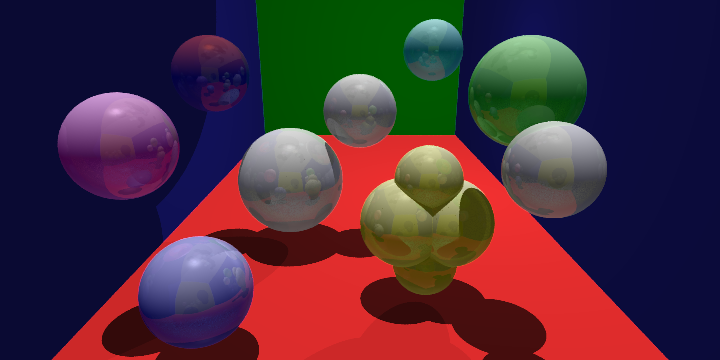
This is an example of all the implemented features together. 4 samples per pixel, 2 directional lights, 1 pointlight, 1 area light (8 light samples), denoised with 60 frames, 5 secondary bounces, ran across 4 threads.
