Blood Cell Detection System is used in order to implement counting and automating the process of detecting the cells that are present in a slide of blood sample. This system also helps in order to make diagnosis in some cases where unidentified cells have entered the bloodstream and have been caught in the blood sample.
This system is designed using YOLOv5.
-
First we have to create a virtual environment using anaconda and install pytorch in order to work with YOLOv5 framework
-
We install YOLOv5 in a fresh directory using:
git clone https://github.com/ultralytics/yolov5.git
cd yolov5
pip install -r requirements.txt
- Then Clone This repository which contains the images and the labels for the project in the "Dataset_main folder"
- Visualize an example image with annotations

- Run the following python code to split the dataset into training and testing sets,
python ./ train_test_val_split.py
- Three folders will be created where all the images and their corresponding labels will be stored for training, testing and validation purposes
- Now we have to create a "data.yaml" file using the code editor and paste the following info in it,
# Train/val/test sets as 1) dir: path/to/imgs, 2) file: path/to/imgs.txt, or 3) list: [path/to/imgs1, path/to/imgs2, ..]

path: D:\kaggle_practice\Blood_Cell_Detection  # dataset root dir
train: D:\kaggle_practice\Blood_Cell_Detection\train  # train images (relative to 'path') 128 images
val: D:\kaggle_practice\Blood_Cell_Detection\valid  # val images (relative to 'path') 128 images
test: D:\kaggle_practice\Blood_Cell_Detection\test  # test images (optional)

# Classes
names:
  0: WBC
  1: RBC
  2: Platelets

# Download script/URL (optional) it will be treated as optional and not hamper the training process
download: https://ultralytics.com/assets/coco128.zipIn order to begin the training remember,
- select the base model according to the available hardware
- if training on local machines use CPU as training device
- if training on colab/kaggle notebooks you can use the gpu or even multi-gpu parallelization
The available base models of YOLOv5 are

The recommended one is to use the small one (YOLOv5s) as it converges pretty fast and easily at the cost of less resources
The commands for training are:
CPU:
python ./yolov5/train.py --img 640 --batch 8 --epochs 50 --data ./data.yaml --workers 1 --weights yolov5s.pt --device cpuSingle GPU:
python ./yolov5/train.py --img 640 --batch 8 --epochs 50 --data ./data.yaml --workers 1 --weights yolov5s.pt --device 0
Multi-GPU Training:
python -m torch.distributed.run --nproc_per_node 2 train.py --batch 16 --data data.yaml --weights yolov5s.pt --device 0,1
In multi gpu training you can use the number of gpus you have by changing --device argument to 0,1,2 for 3 gpus and 0,1 for 2 gpus and tweak the load that the gpus share by editing the nproc_per_node 2 to any number of processes that the gpus have to run simultaneously.
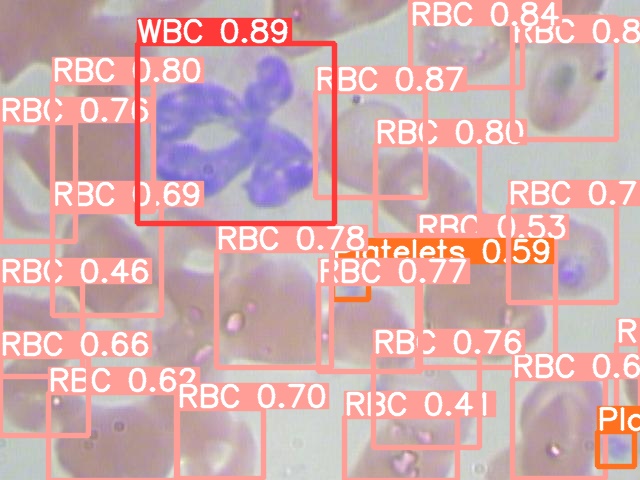
After the training is done we can perform the predictions on the testing set for seeing the results of the trained model. In order to do this run the following command,
python ./yolov5/detect.py --weights ./yolov5/runs/train/exp/weights/best.pt --img 640 --conf 0.4 --source ./test/images
The images along with the detected items and bounding boxes are saved at location
./yolov5/runs/detect/exp
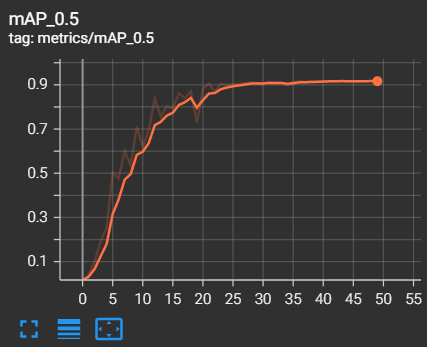
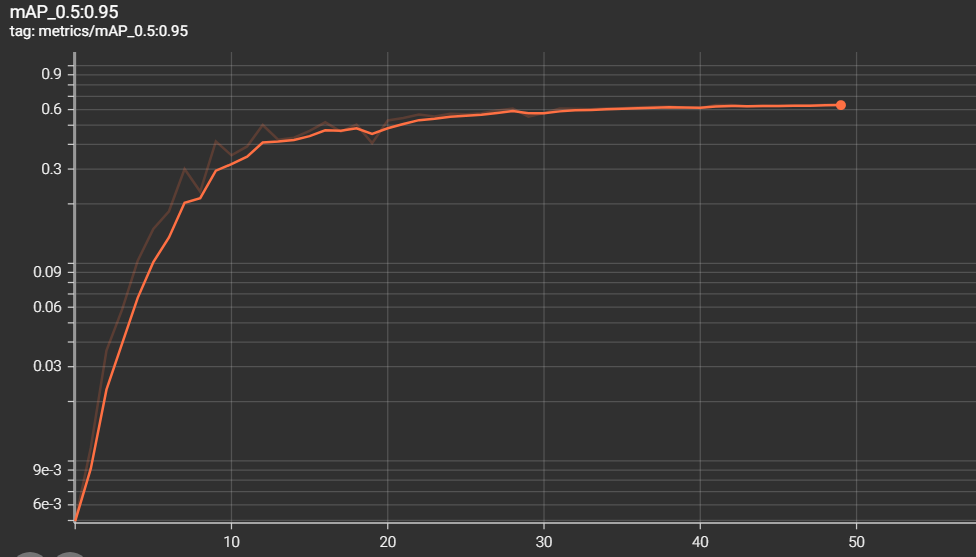
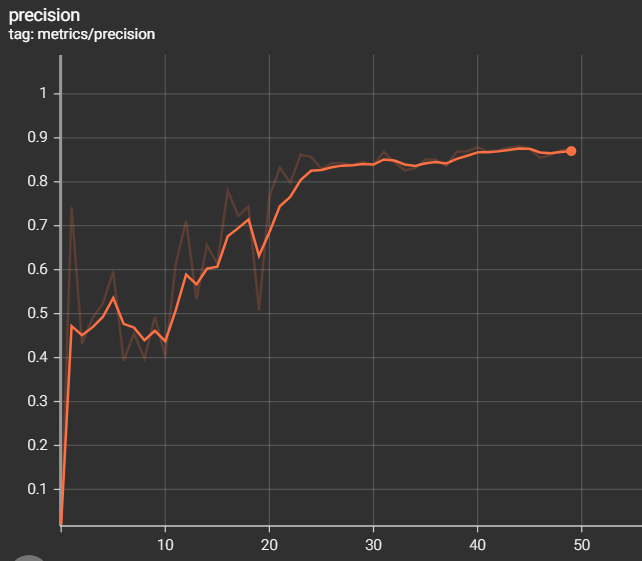
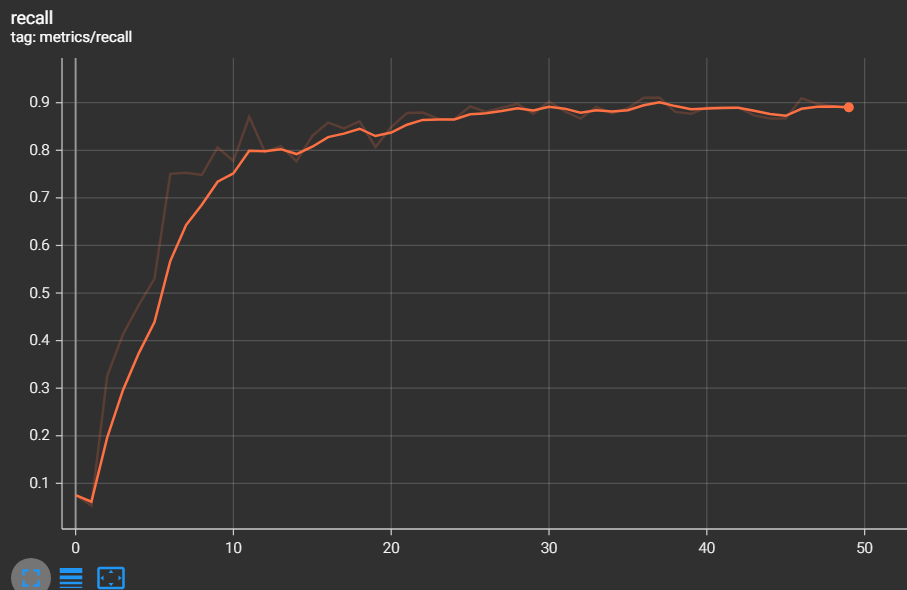
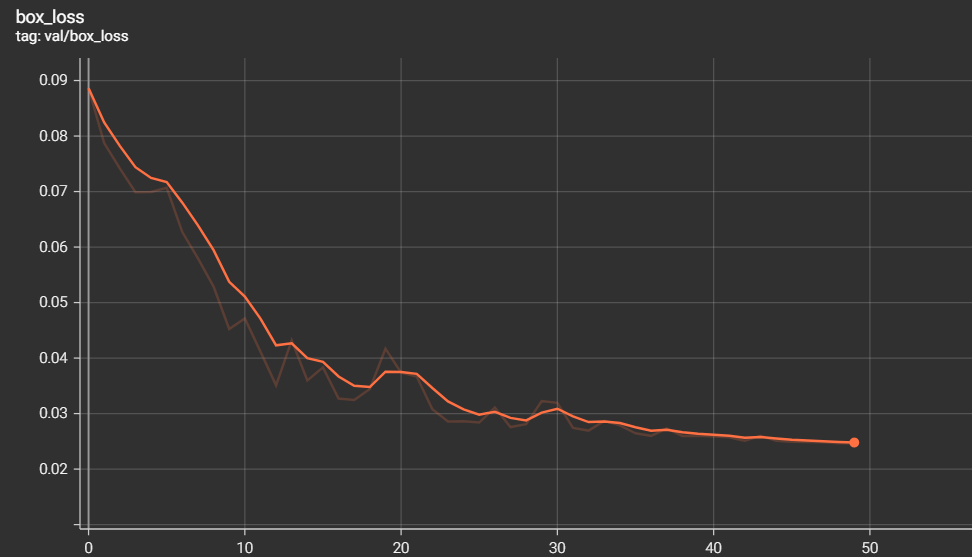
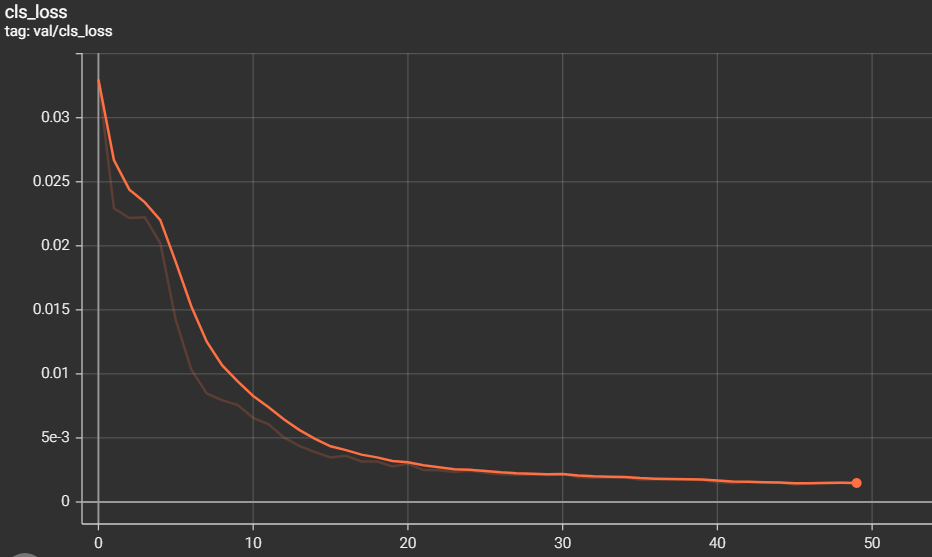
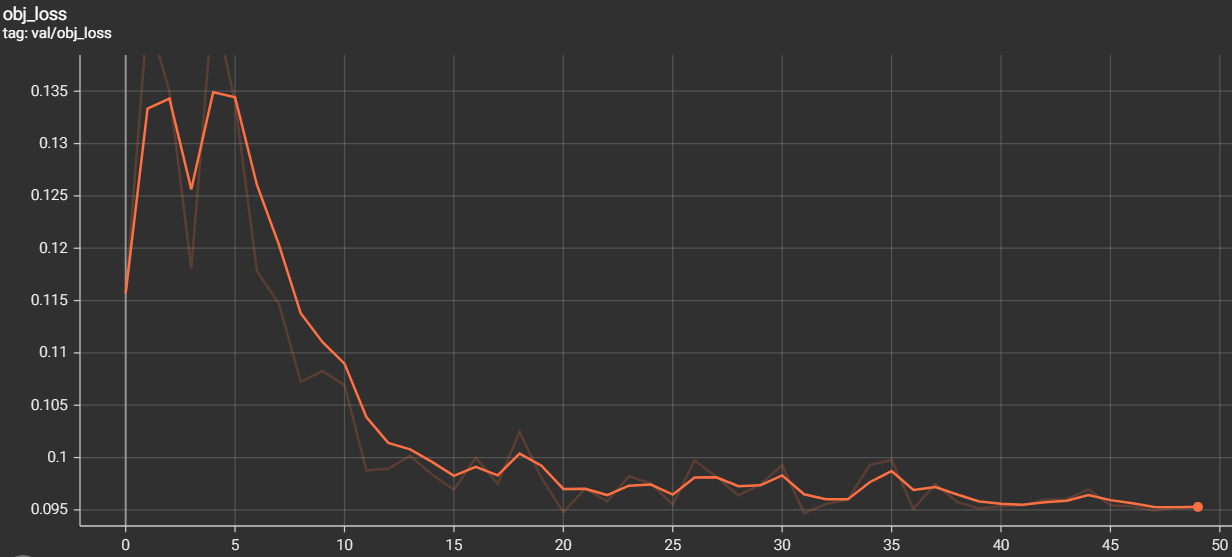
The metrics of measurements are the results of training and validation that we have found during the training phase
- mAP 0.5 = 0.9165
- mAP 0.5:0.95 = 0.6343
- Author who compiled the annotations for the dataset
- The Authors who annotated the data
