| No | Title | File |
|---|---|---|
| 1. | Systematic Literature Review Template |  |
| 2. | Li, J., Othman, M. S., Chen, H., & Yusuf, L. M. (2024). A critical review of feature selection methods for machine learning in IoT security. International Journal of Communication Networks and Distributed Systems, 30(3), 264-312. |  |
| 3. | Bauer, A., Coppola, R., Alégroth, E., & Gorschek, T. (2023). Code review guidelines for GUI-based testing artifacts. Information and Software Technology, 163, 107299. |  |
| 4. | De la Torre-López, J., Ramírez, A., & Romero, J. R. (2023). Artificial intelligence to automate the systematic review of scientific literature. Computing, 105(10), 2171–2194. |  |
| 5. | Carbonell-Alcocer, A., Romero-Luis, J., Gertrudix, M., & Wuebben, D. (2023). Datasets on the assessment of the scientific publication’s corpora in circular economy and bioenergy approached from education and communication. Data in Brief, 47, 108958. |  |
| 6. | Marcos Dib, Carlos Alberto Alvares Rocha, Li Weigang, & Allan V. A. Faria. (2022). Systematic Literature Review about Text Classification (Version 1) [Data set]. Zenodo. https://doi.org/10.5281/zenodo.7017720 |  |
| 7. | Juan Cruz-Benito (2016). Systematic Literature Review & Mapping |  |
What You Need to Do Before Joining this class 🚀
To use the Obsidian Vault for Systematic Literature Reviews, please follow these steps:
- Click on this link to download the file named mySLR_adv_mso.zip.
- Extract the file to a folder of your choice.
- Install Obsidian software from this website if you don't have it already.
- Open Obsidian and select Open another vault.
- Choose the folder where you extracted the file in step 2.
- You can now access the Obsidian Vault for Systematic Literature Reviews and start your training.
Obsidian is a powerful note-taking app that allows you to create and link your notes in various ways. To enhance your note-taking experience, you can use plugins that add extra features and functionalities to Obsidian. The plugins used in this vault are as follows:
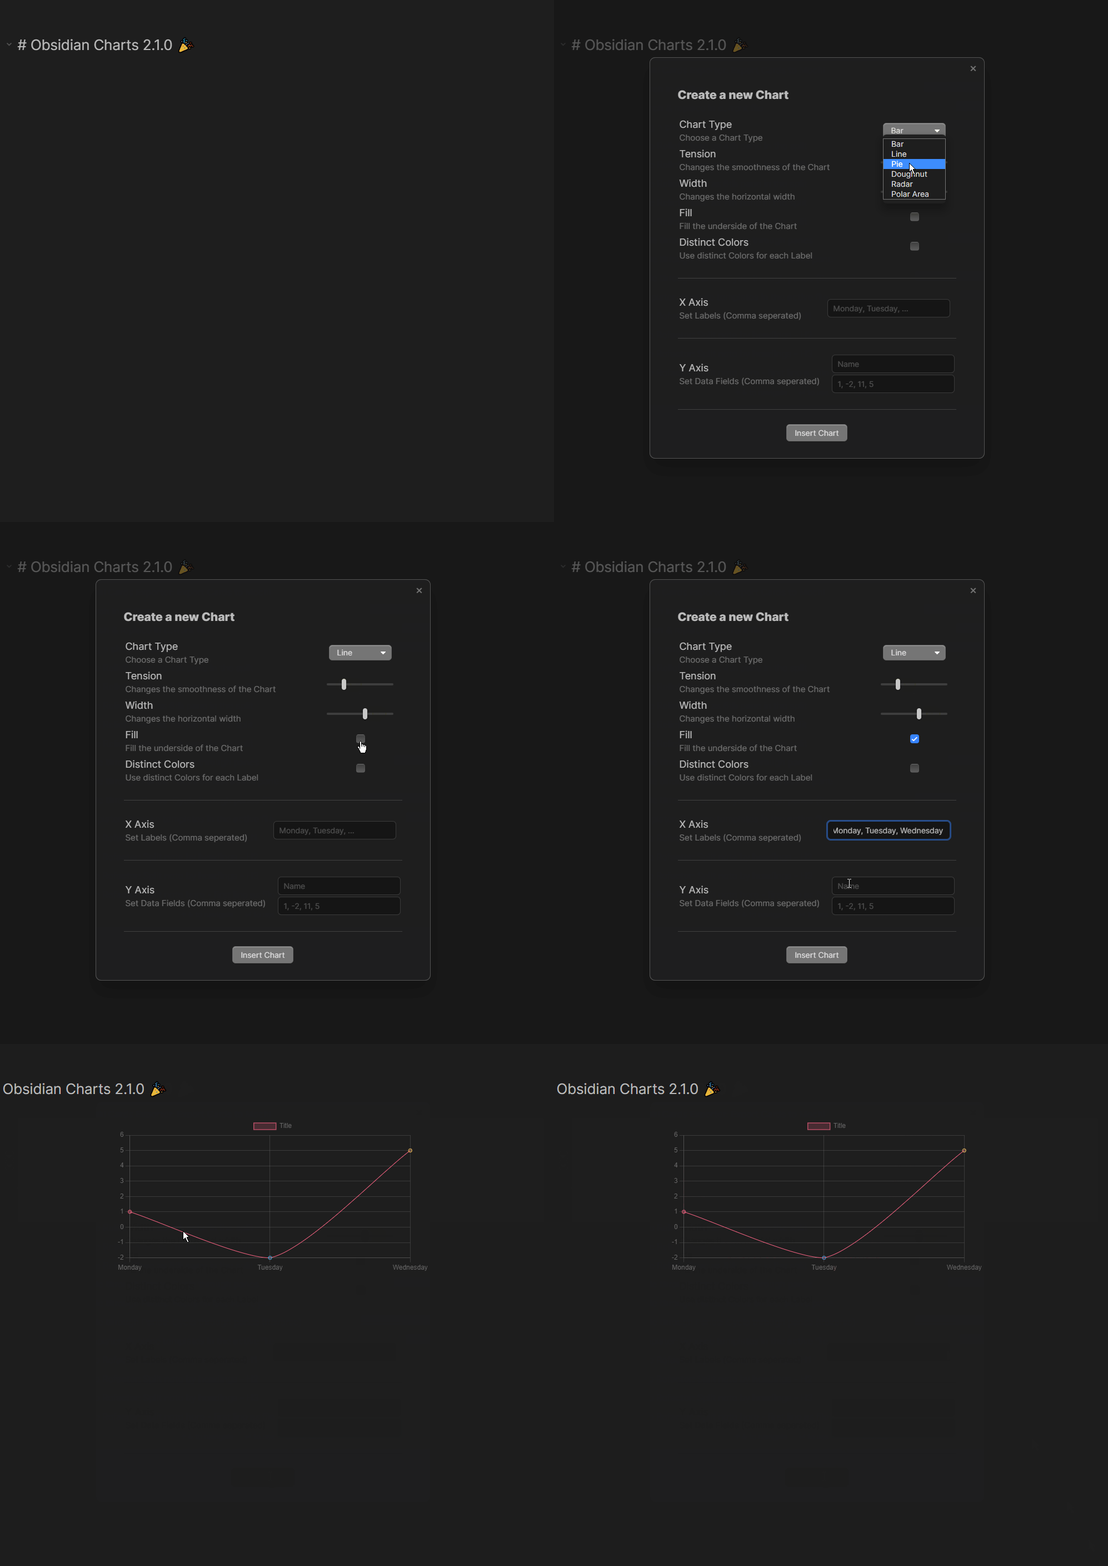
Charts plugin enables users to create editable, interactive, and animated charts in Obsidian using Chart.js. It supports a variety of chart types, including pie, bar, line, radar, and more. Users can customize these charts with various options to suit their needs.
- Go to Community Plugins in your Obsidian Settings and disable Safe Mode
- Click on Browse and search for "Charts"
- Click install
- Toggle the Plugin on in the Community Plugins Tab
- For simple Charts you can use the graphical Chart Creator, you can access it via the Command Palette or you can even set a Hotkey!
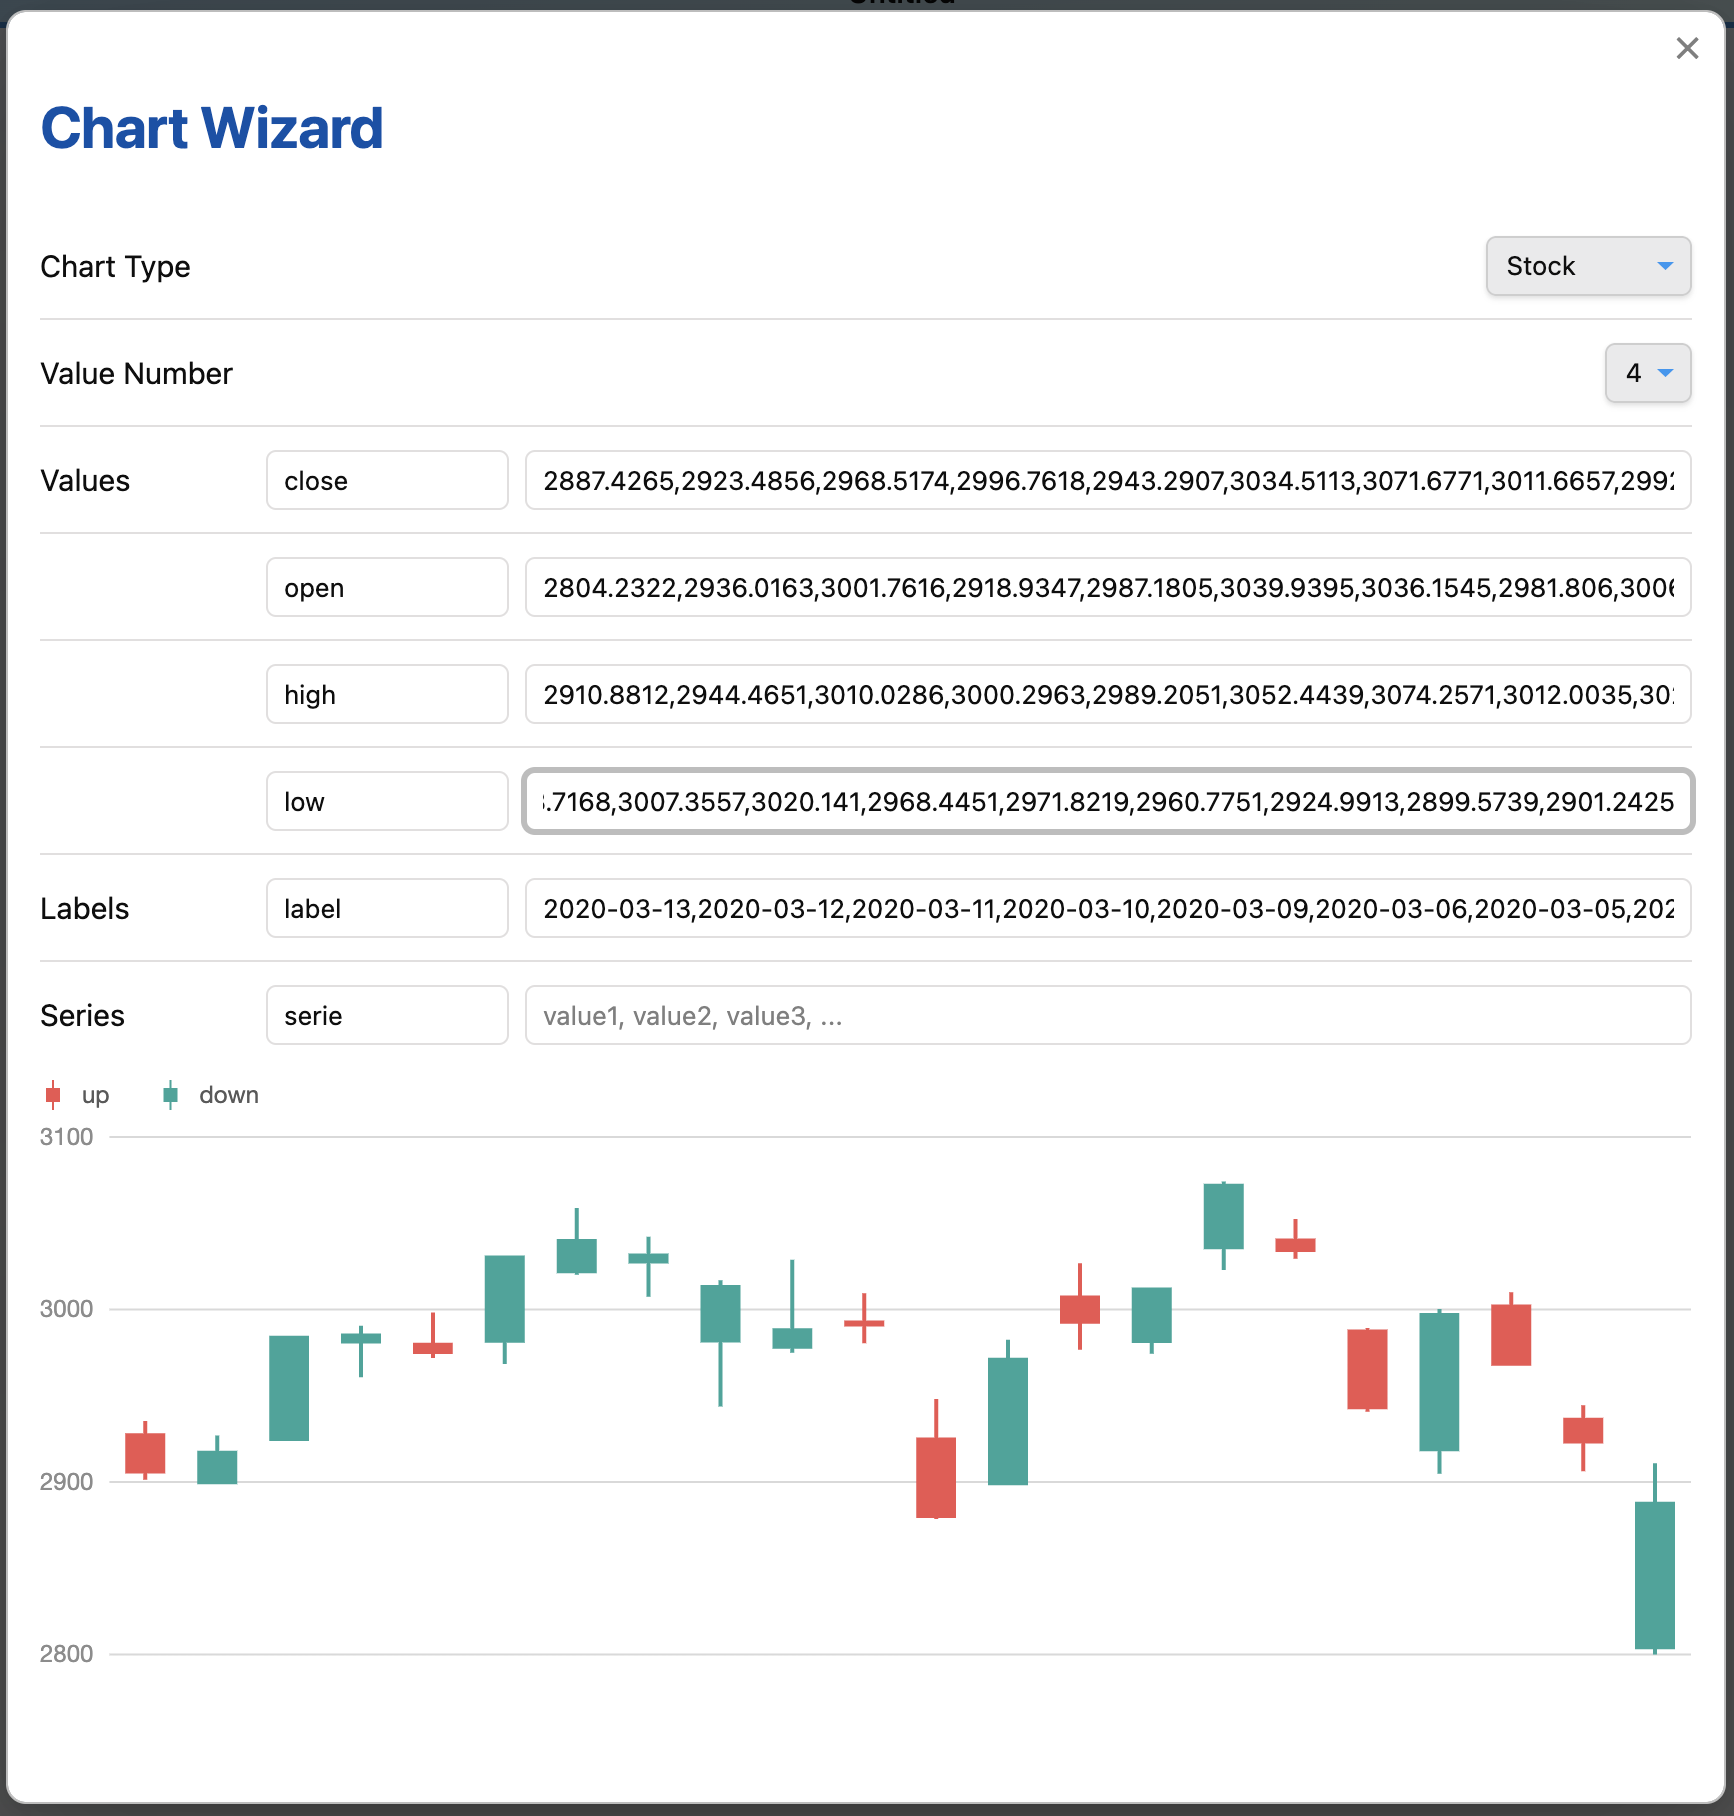
The Chartview plugin offers another data visualization solution in Obsidian. It is based on Ant Design Charts and supports plots and graphs such as word clouds, treemaps, dual axes, mix, organization tree graph, and more. Users can import data from external or internal CSV files or generate data using dataviewjs.
Use command Charts View: Wizard to insert code block.
The Pandoc Plugin allows users to export their notes to a variety of formats using Pandoc, a command-line tool for document conversion. Supported export formats include Word, PDF, ePub, HTML, PowerPoint, LaTeX, and more. Users can also use Pandoc templates and citations to customize the output according to their preferences.
This lets you write presentations, draft books, make webpages, and write assignments all in Markdown, and export to whichever format you fancy, all without leaving Obsidian.
- Press
Ctrl+P/Cmd+Pto show the command palette - Search
Pandoc - Choose your export format
- If all goes well, it will say it was successful
- If you exported a file called
Pandoc.mdas a Word Document, in your file explorer there will be aPandoc.docxfile in the same folder
A common issue is that the settings page will display the red error message Pandoc is not installed or accessible on your PATH. This plugin's functionality will be limited.
If you encounter this issue: Installing pandoc
- Open the plugin settings and scroll to the bottom
- There is a setting called
Pandoc path. Set this setting to:- Mac/Linux: the output of
which pandocin a terminal - Windows: the output of
Get-Command pandocin PowerShell
- Mac/Linux: the output of
After fixing it, relaunch Obsidian and it should work!
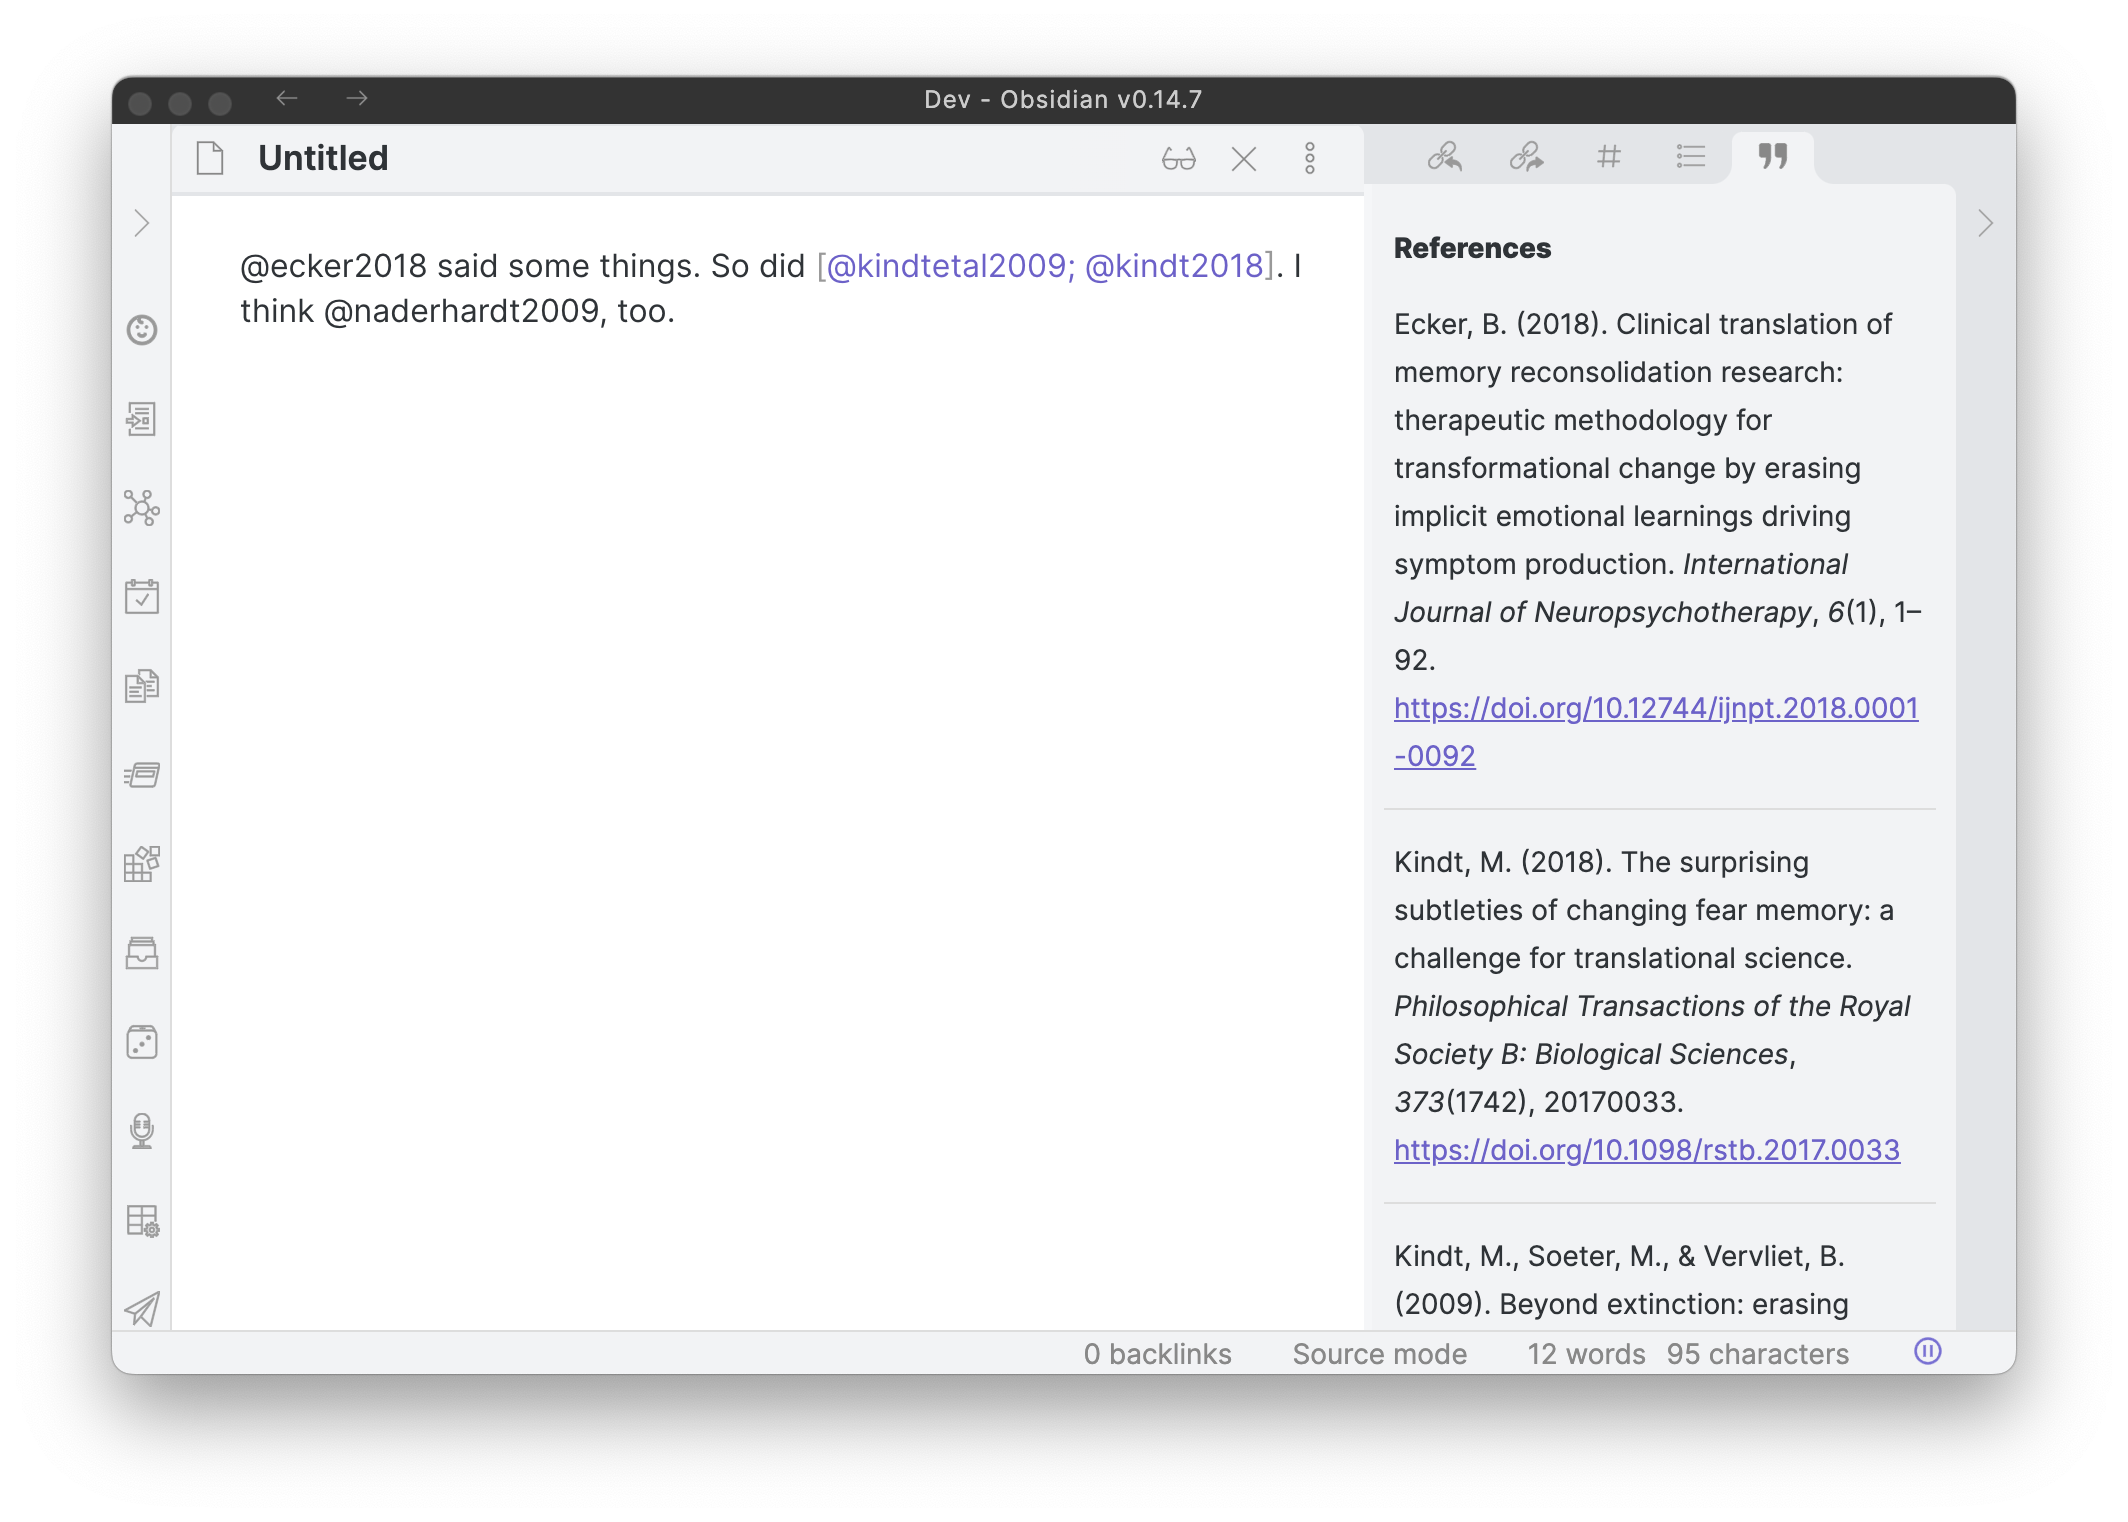
The Pandoc Reference List plugin provides a formatted reference in the sidebar for each Pandoc citekey present in the current document. It utilizes Pandoc to generate the reference style, and users can choose from thousands of CSL styles. To use this plugin, users need to supply a compatible bibliography file, such as a .bib or .json file, which contains the references.
- Ensure Pandoc is installed. This plugin requires at least version 2.11.
- Supply a path to a compatible bibliography file
- (Optional) Supply a path or URL to a compatible CSL style
These plugins can help you make your notes more organized, informative, and creative. You can install them from the Obsidian community plugins page or from their GitHub repositories.
To check for updates for your plugins, please follow these steps:
- Go to Settings → Community plugins → Current plugins.
- Click on the Check for updates button. You will update all plugins.
GitHub Desktop is a free and open source application that lets you interact with GitHub repositories using a graphical user interface. You can use it to clone, create, commit, push, pull, and merge your code, as well as manage branches, issues, pull requests, and more.
To install GitHub Desktop, you need to have a supported operating system, which currently include macOS 10.13 or later and Windows 10 64-bit or later. Here are the steps for each platform:
-
macOS:
- Visit the download page for GitHub Desktop.
- Click Download for macOS.
- In your computer's Downloads folder, double-click the GitHub Desktop.zip file.
- Unpack the application and put it wherever you want.
- Launch GitHub Desktop and sign in with your GitHub account.
-
Windows:
- Visit the download page for GitHub Desktop.
- Click Download for Windows.
- In your computer's Downloads folder, double-click the GitHubDesktopSetup.exe file.
- Allow the installation to download and install.
- Launch GitHub Desktop and sign in with your GitHub account.
Please create an Issue for any improvements, suggestions or errors in the content.
You can also contact me using Linkedin for any other queries or feedback.


