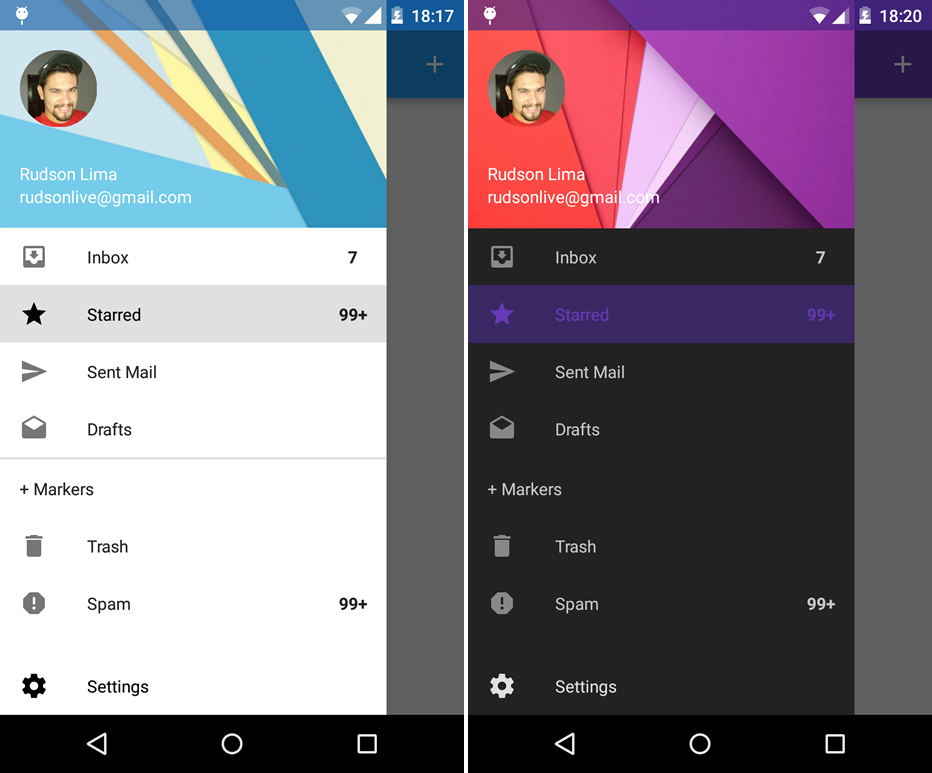
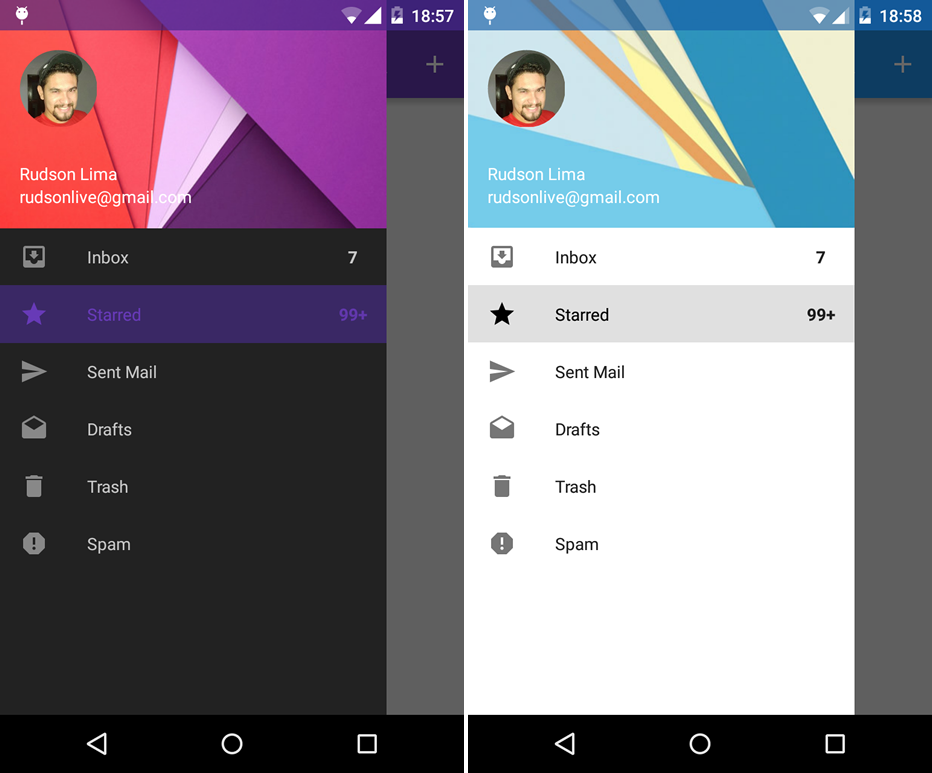
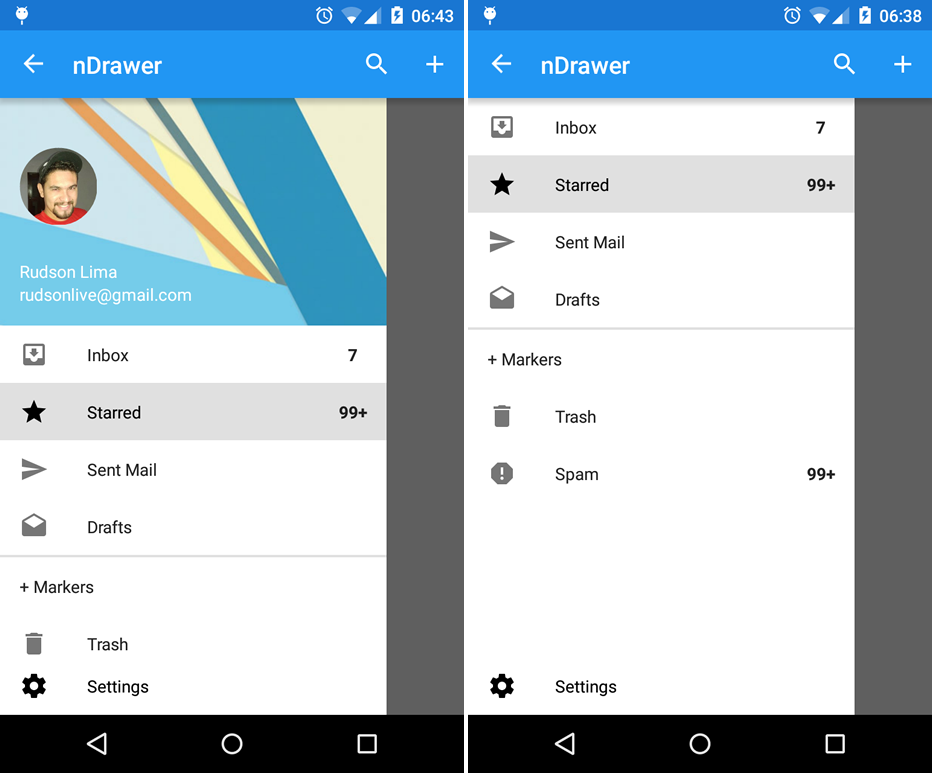
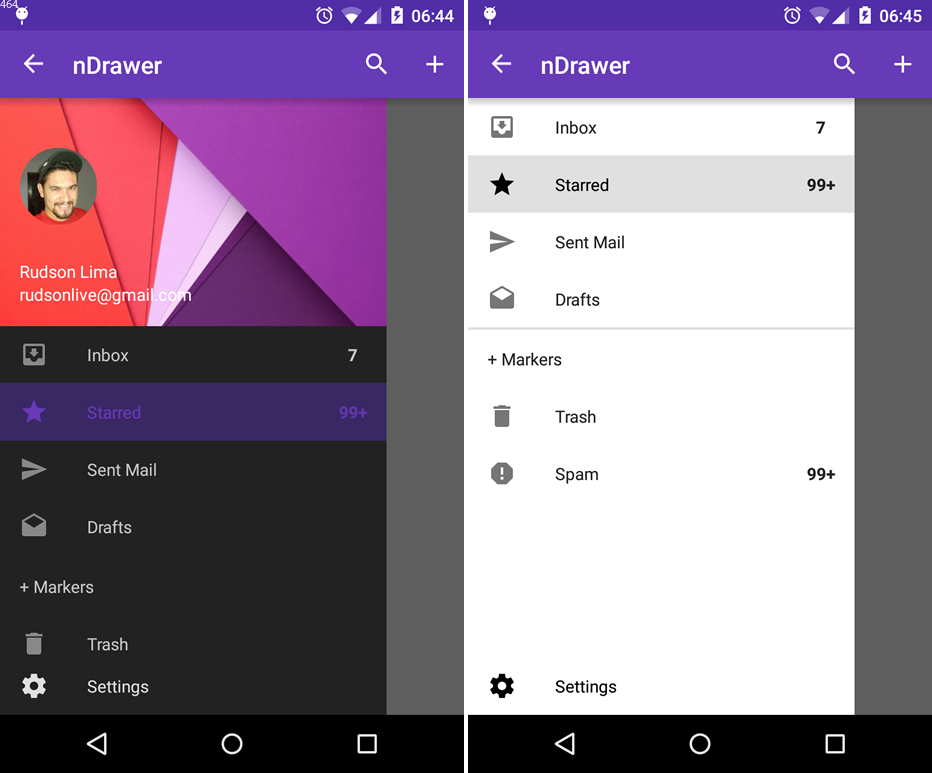
#Navigation drawer (library)
It requires 14+ API and android support v7 22.1.1 (AppCompatActivity + Toolbar)
###Sample Application

How to use? Very simple! : D
#If you want, check versions before
Change Log
Log file
#How to add to your project
###Gradle
dependencies {
        compile 'br.com.liveo:navigationdrawer-material:2.0.1'
}###Maven
<dependency>
  <groupId>br.com.liveo</groupId>
  <artifactId>navigationdrawer-material</artifactId>
  <version>2.0.1</version>
  <type>aar</type>
</dependency>
In your styles.xml choose your version:
<!--Customize here the subject of your application-->
    <style name="myTheme" parent="Theme.AppCompat.Light.DarkActionBar">
        <!-- Customize your theme here. -->
        <item name="colorPrimary">@color/nliveo_blue_colorPrimary</item>
        <item name="colorPrimaryDark">@color/nliveo_blue_colorPrimaryDark</item>
        <item name="colorAccent">@color/nliveo_blue_colorPrimary</item>
    </style>
<!--Here will be the theme of the class that will extends NavigationLiveo-->
    <style name="nLiveoDrawer" parent="nLiveo.Theme.DarkActionBar">
        <!-- Customize your theme here. -->
        <item name="colorPrimary">@color/nliveo_blue_colorPrimary</item>
        <item name="colorPrimaryDark">@color/nliveo_blue_alpha_colorPrimaryDark</item>
        <item name="colorAccent">@color/nliveo_blue_colorPrimary</item>
    </style>
Also there is nLiveo.Theme.Light theme
note: colorPrimaryDark property theme "nLiveoDrawer" should receive a color with alpha eg # 80RRGGBB - The "# 80" will ensure the transparency of statusBar.
Remember to set your theme in your AndroidManifest.xml:
    <application
    <!--Theme of your application-->
android:theme="@style/myTheme" > <activity
<!--Theme of the class that will extends NavigationLiveo-->
android:name=".MainActivity"
android:theme="@style/nLiveoDrawer" //This is only necessary if using the NavigationLiveo
</activity>
</application>#In your Activity...
Create a class and it extends the NavigationLiveo and implement the br.liveo.interfaces.OnItemClickListener.
Ex: public class MainActivity extends NavigationLiveo implements OnItemClickListener {
###Do not use the method "onCreate" and "setContentView" of your Activity, you will use the method "onInt"
In the method "onInt" inform the items on your list
@Override
    public void onInt(Bundle savedInstanceState) {
        //Creation of the list items is here

        this.userName.setText("Rudson Lima");
        this.userEmail.setText("rudsonlive@gmail.com");
        this.userPhoto.setImageResource(R.drawable.ic_rudsonlive);
        this.userBackground.setImageResource(R.drawable.ic_user_background_second);

        // name of the list items
        mListNameItem = new ArrayList<>();
        mListNameItem.add(0, getString(R.string.inbox));
        mListNameItem.add(1, getString(R.string.starred));
        mListNameItem.add(2, getString(R.string.sent_mail));
        mListNameItem.add(3, getString(R.string.drafts));
        mListNameItem.add(4, getString(R.string.more_markers)); //This item will be a subHeader
        mListNameItem.add(5, getString(R.string.trash));
        mListNameItem.add(6, getString(R.string.spam));

        // icons list items
        List<Integer> mListIconItem = new ArrayList<>();
        mListIconItem.add(0, R.drawable.ic_inbox_black_24dp);
        mListIconItem.add(1, R.drawable.ic_star_black_24dp); //Item no icon set 0
        mListIconItem.add(2, R.drawable.ic_send_black_24dp); //Item no icon set 0
        mListIconItem.add(3, R.drawable.ic_drafts_black_24dp);
        mListIconItem.add(4, 0); //When the item is a subHeader the value of the icon 0
        mListIconItem.add(5, R.drawable.ic_delete_black_24dp);
        mListIconItem.add(6, R.drawable.ic_report_black_24dp);

        //{optional} - Among the names there is some subheader, you must indicate it here
        List<Integer> mListHeaderItem = new ArrayList<>();
        mListHeaderItem.add(4);

        //{optional} - Among the names there is any item counter, you must indicate it (position) and the value here
        SparseIntArray mSparseCounterItem = new SparseIntArray(); //indicate all items that have a counter
        mSparseCounterItem.put(0, 7);
        mSparseCounterItem.put(1, 123);
        mSparseCounterItem.put(6, 250);

        //If you want to create your own user header just do the following
        //View mCustomHeader = getLayoutInflater().inflate(R.layout.custom_header_user, this.getListView(), false);
        //ImageView imageView = (ImageView) mCustomHeader.findViewById(R.id.imageView);

        with(this).startingPosition(1) //Starting position in the list
                .nameItem(mListNameItem)
                .iconItem(mListIconItem)
                .headerItem(mListHeaderItem)
                .countItem(mSparseCounterItem)

                //This will add the new header and remove the default user header
                //.customHeader(mCustomHeader)

                //{optional} - List Customization "If you remove these methods and the list will take his white standard color"
                //.selectorCheck(R.drawable.selector_check) //Inform the background of the selected item color
                //.colorItemDefault(R.color.nliveo_gray) //Inform the standard color name, icon and counter
                //.colorItemSelected(R.color.nliveo_purple_colorPrimary) //State the name of the color, icon and meter when it is selected
                //.backgroundList(R.color.nliveo_black_light) //Inform the list of background color
                //.colorLineSeparator(R.color.nliveo_transparent) //Inform the color of the subheader line
                //{optional} - List Customization

                //If not please use the footer item, use the ".removeFooter()" method;
                .footerItem(R.string.settings, R.drawable.ic_settings_black_24dp)

                .setOnClickUser(onClickPhoto)
                .setOnClickFooter(onClickFooter)
                .build();

    }
In the method "onItemClick" you can get the position of the clicked item and the layout that you must inform the replace is the library R.id.container.
    @Override //The "R.id.container" should be used in "beginTransaction (). Replace"
    public void onItemClick(int position) {
        FragmentManager mFragmentManager = getSupportFragmentManager();
        Fragment mFragment = new FragmentMain().newInstance(mListNameItem.get(position));

        if (mFragment != null){
            mFragmentManager.beginTransaction().replace(R.id.container, mFragment).commit();
        }
    }
User photo onClick - Inform the listener in .setOnClickUser(onClickPhoto) method in onInit ();
    private View.OnClickListener onClickPhoto = new View.OnClickListener() {
        @Override
        public void onClick(View v) {
            closeDrawer();
        }
    };
Footer onClick - Inform the listener in .setOnClickFooter(onClickFooter) method in onInit ();
    private View.OnClickListener onClickFooter = new View.OnClickListener() {
        @Override
        public void onClick(View v) {
            closeDrawer();
        }
    };

To use the NavigationActionBarLiveo, remove the theme "android:theme="@style/nLiveoDrawer"" demo project and extend the MainActitivity of NavigationActionBarLiveo

To remove the header, use the method ".removeHeader()"

Your application uses this library? You can promote it here! Just send your application that will be happy to disclose..
#Developed By
Name: Rudson Lima
E-mail: rudsonlive@gmail.com
Subject: Navigation Drawer - Material Design
When using the design please remove all images and strings referring to Live-O. Thank you: D
#License
  Copyright 2015 Rudson Lima

  Licensed under the Apache License, Version 2.0 (the "License");
  you may not use this file except in compliance with the License.
  You may obtain a copy of the License at

      http://www.apache.org/licenses/LICENSE-2.0

  Unless required by applicable law or agreed to in writing, software
  distributed under the License is distributed on an "AS IS" BASIS,
  WITHOUT WARRANTIES OR CONDITIONS OF ANY KIND, either express or implied.
  See the License for the specific language governing permissions and
  limitations under the License.
reference: NavigationDrawer
