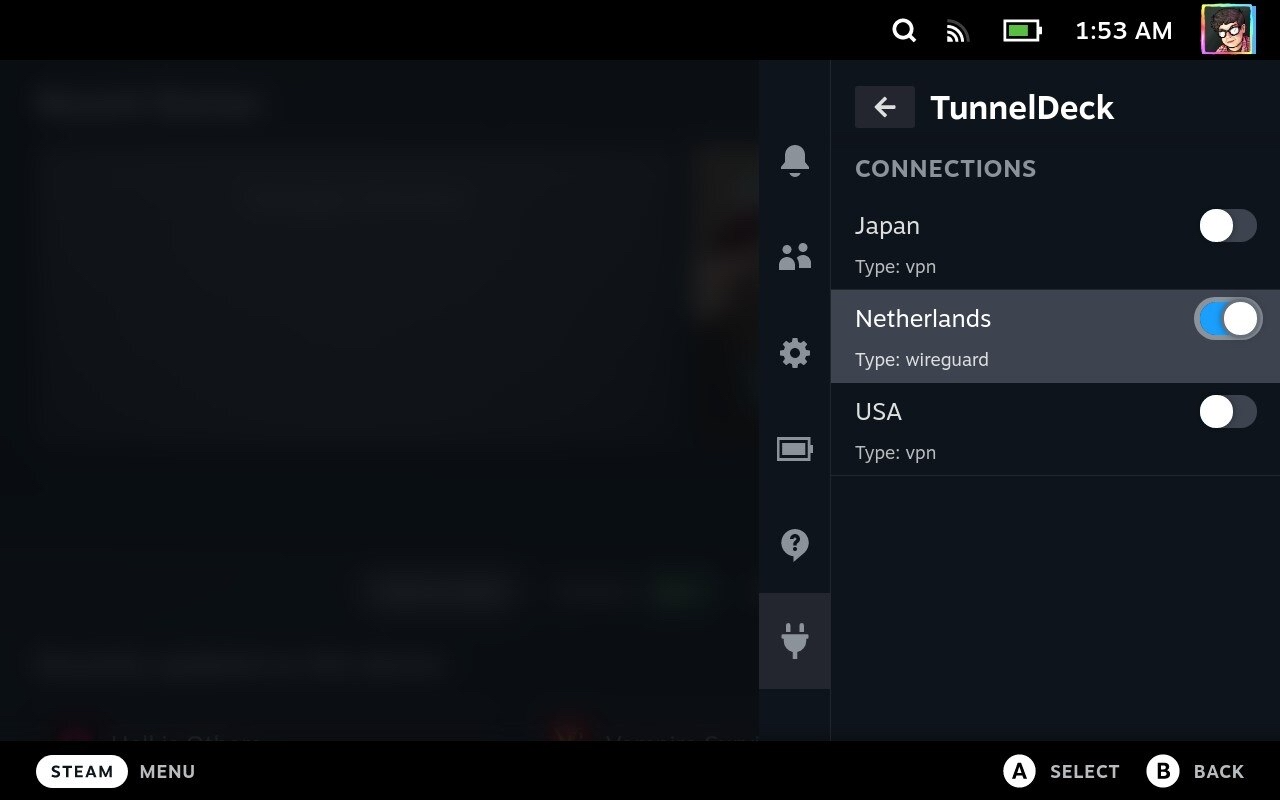
TunnelDeck allows you to access any OpenVPN or WireGuard connections from the Network Manager. Any connections that are added in desktop mode or from the command line will be available to connect to from the TunnelDeck menu.
TunnelDeck also has an option to install the OpenVPN package for Network manager as a system extension. This means that your file system can remain read only and pacman does not need to be configured.
If you want to get in contact with the developers, we can be found in the SteamDeckHomebrew Discord.
- Enable OpenVPN: Installs the Network Manager OpenVPN plugin.
- Disable IPV6: - Disables IPV6 traffic on the current network connect (e.g. wlan). May be required for some VPNs that do not fully support IPV6.
Using a VPN to access Steam is against their terms of service and the developers of TunnelDeck take no responsibility for any action Valve may take against your account. While it's unlikely that you will be banned but we'd recommend avoiding purchasing games while connected to the VPN.
Note: You may be logged out from Steam and will need to log back in if you remain connected to their servers while using a VPN.
Connecting to a VPN in TunnelDeck currently requires it to be setup in desktop mode — usually with a .conf or .ovpn file provided my your VPN provider.
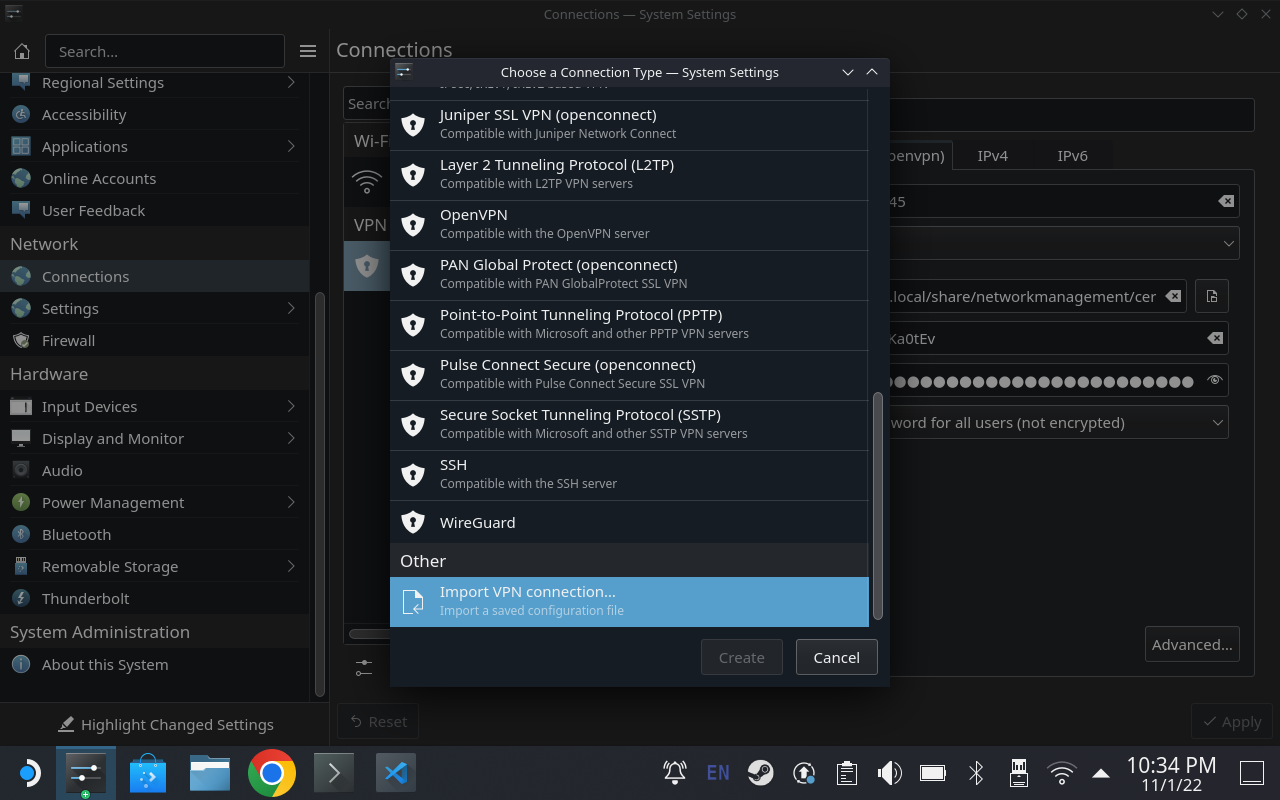
From desktop mode, open the System Settings and select Connections in the Network section from the sidebar.
To create a new VPN connection, click the + button and scroll down to the Other section. Select the Import VPN connection... option and select the .conf or .ovpn file provided by your VPN provider.
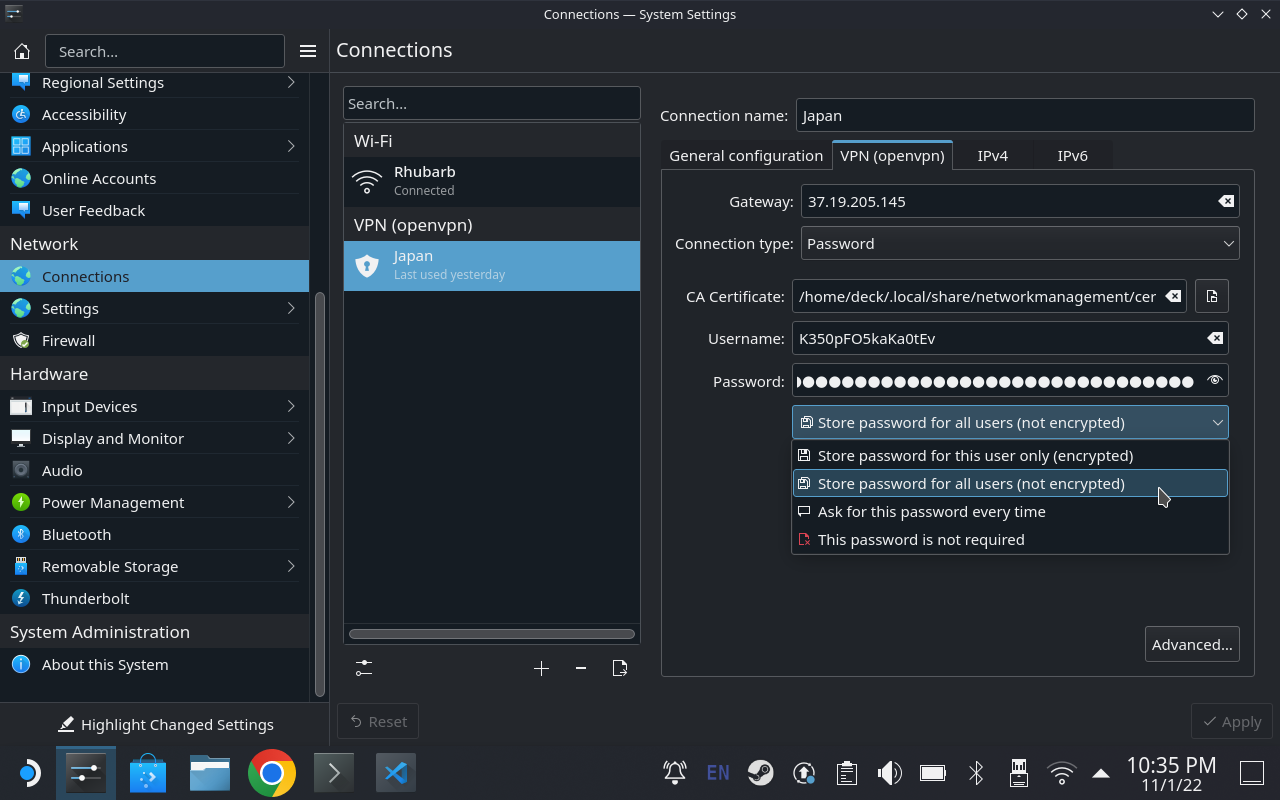
Some VPN connections required a username and password. These should be entered in the VPN tab of the newly created connection. It's important that the Store password for all users (not encrypted) option is selected as TunnelDeck establishes the VPN connection as the root user.
Once the connection has been created and saved in Desktop Mode, TunnelDeck is ready to be used in Gaming Mode.
Open the quick access menu by clicking the ... on your Steam Deck and select TunnelDeck from the Decky Plugins panel. Here you'll be able to see all of the connections you have in Network Manager and simply click on the toggle to connect or disconnect from the VPN.
- Stephen Radford - Developer
- AAGaming - Answering my annoying questions
- Kevin Wammer - Idea and name
pnpm i
pnpm run build


