Beacuse My project need to this library and this project doesn't update for a long time. So I forked MWPhotoBrowser and update 3 library dependecy for using.
Update
- MBProgressHUD
- 0.9 -> 1.0.0
- SDWebImage
- 3.7 -> 4.0.0
- DACircularProgress
- 2.3 -> 2.3.1
Insert these to your Podfile.
pod 'MWPhotoBrowser', :git => 'https://github.com/EvoIos/MWPhotoBrowser.git', :commit => 'de697e101195557ddca85661ebb266fd3f10776c'
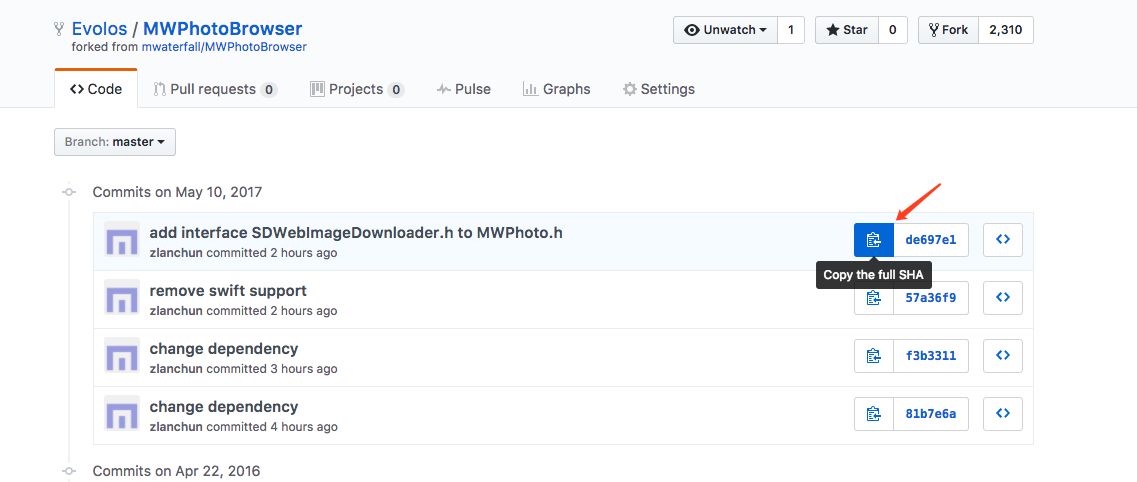
This SHA you can find there:
commits -> Copy the full SHA
just like:
Add library in your Podfile:
# Pay attention to here, you must add source in this session.
source 'https://github.com/EvoIos/Specs.git'
source 'https://github.com/CocoaPods/Specs.git'

pod 'MWPhotoBrowser', '~> 2.1.2-0.1.1'
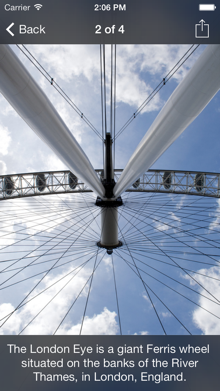
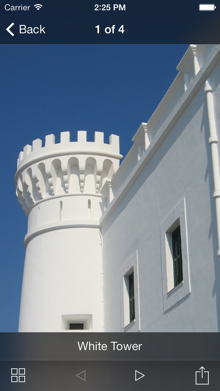
MWPhotoBrowser can display one or more images or videos by providing either UIImage objects, PHAsset objects, or URLs to library assets, web images/videos or local files. The photo browser handles the downloading and caching of photos from the web seamlessly. Photos can be zoomed and panned, and optional (customisable) captions can be displayed.
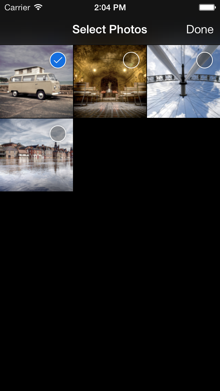
The browser can also be used to allow the user to select one or more photos using either the grid or main image view.
Works on iOS 7+. All strings are localisable so they can be used in apps that support multiple languages.
MWPhotoBrowser is designed to be presented within a navigation controller. Simply set the delegate (which must conform to MWPhotoBrowserDelegate) and implement the 2 required delegate methods to provide the photo browser with the data in the form of MWPhoto objects. You can create an MWPhoto object by providing a UIImage object, PHAsset object, or a URL containing the path to a file, an image online or an asset from the asset library.
MWPhoto objects handle caching, file management, downloading of web images, and various optimisations for you. If however you would like to use your own data model to represent photos you can simply ensure your model conforms to the MWPhoto protocol. You can then handle the management of caching, downloads, etc, yourself. More information on this can be found in MWPhotoProtocol.h.
See the code snippet below for an example of how to implement the photo browser. There is also a simple demo app within the project.
// Create array of MWPhoto objects
self.photos = [NSMutableArray array];

// Add photos
[photos addObject:[MWPhoto photoWithURL:[NSURL fileURLWithPath:[[NSBundle mainBundle] pathForResource:@"photo2l" ofType:@"jpg"]]]];
[photos addObject:[MWPhoto photoWithURL:[NSURL URLWithString:@"http://farm4.static.flickr.com/3629/3339128908_7aecabc34b.jpg"]]];
[photos addObject:[MWPhoto photoWithURL:[NSURL URLWithString:@"http://farm4.static.flickr.com/3590/3329114220_5fbc5bc92b.jpg"]]];

// Add video with poster photo
MWPhoto *video = [MWPhoto photoWithURL:[NSURL URLWithString:@"https://scontent.cdninstagram.com/hphotos-xpt1/t51.2885-15/e15/11192696_824079697688618_1761661_n.jpg"]];
video.videoURL = [[NSURL alloc] initWithString:@"https://scontent.cdninstagram.com/hphotos-xpa1/t50.2886-16/11200303_1440130956287424_1714699187_n.mp4"];
[photos addObject:video];

// Create browser (must be done each time photo browser is
// displayed. Photo browser objects cannot be re-used)
MWPhotoBrowser *browser = [[MWPhotoBrowser alloc] initWithDelegate:self];

// Set options
browser.displayActionButton = YES; // Show action button to allow sharing, copying, etc (defaults to YES)
browser.displayNavArrows = NO; // Whether to display left and right nav arrows on toolbar (defaults to NO)
browser.displaySelectionButtons = NO; // Whether selection buttons are shown on each image (defaults to NO)
browser.zoomPhotosToFill = YES; // Images that almost fill the screen will be initially zoomed to fill (defaults to YES)
browser.alwaysShowControls = NO; // Allows to control whether the bars and controls are always visible or whether they fade away to show the photo full (defaults to NO)
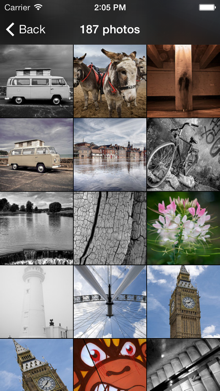
browser.enableGrid = YES; // Whether to allow the viewing of all the photo thumbnails on a grid (defaults to YES)
browser.startOnGrid = NO; // Whether to start on the grid of thumbnails instead of the first photo (defaults to NO)
browser.autoPlayOnAppear = NO; // Auto-play first video

// Customise selection images to change colours if required
browser.customImageSelectedIconName = @"ImageSelected.png";
browser.customImageSelectedSmallIconName = @"ImageSelectedSmall.png";

// Optionally set the current visible photo before displaying
[browser setCurrentPhotoIndex:1];

// Present
[self.navigationController pushViewController:browser animated:YES];

// Manipulate
[browser showNextPhotoAnimated:YES];
[browser showPreviousPhotoAnimated:YES];
[browser setCurrentPhotoIndex:10];
Then respond to the required delegate methods:
- (NSUInteger)numberOfPhotosInPhotoBrowser:(MWPhotoBrowser *)photoBrowser {
    return self.photos.count;
}

- (id <MWPhoto>)photoBrowser:(MWPhotoBrowser *)photoBrowser photoAtIndex:(NSUInteger)index {
    if (index < self.photos.count) {
        return [self.photos objectAtIndex:index];
    }
    return nil;
}
You can present the browser modally simply by wrapping it in a new navigation controller and presenting that. The demo app allows you to toggle between the two presentation types.
You can represent videos in MWPhoto objects by providing a standard MWPhoto image object with a videoURL. You can also use a PHAsset object or a URL to an assets library video.
// Video with URL including poster photo
MWPhoto *video = [MWPhoto photoWithURL:[NSURL URLWithString:@"https://scontent.cdninstagram.com/hphotos-xpt1/t51.2885-15/e15/11192696_824079697688618_1761661_n.jpg"]];
video.videoURL = [NSURL URLWithString:@"https://scontent.cdninstagram.com/hphotos-xpa1/t50.2886-16/11200303_1440130956287424_1714699187_n.mp4"];

// Video with PHAsset
MWPhoto *video = [MWPhoto photoWithAsset:asset targetSize:[UIScreen mainScreen].bounds.size]; // Example sizing

// Video with ALAsset
MWPhoto *video = [MWPhoto photoWithURL:asset.defaultRepresentation.url];
if ([asset valueForProperty:ALAssetPropertyType] == ALAssetTypeVideo) {
    photo.videoURL = asset.defaultRepresentation.url;
}

// Video with no poster photo
MWPhoto *video = [MWPhoto videoWithURL:[NSURL URLWithString:@"https://scontent.cdninstagram.com/hphotos-xfa1/t50.2886-16/11237510_945154435524423_2137519922_n.mp4"]];

// Video grid thumbnail
MWPhoto *videoThumb = [MWPhoto photoWithURL:[NSURL URLWithString:@"https://scontent.cdninstagram.com/hphotos-xaf1/t51.2885-15/s150x150/e15/11240463_963135443745570_1519872157_n.jpg"]];
videoThumb.isVideo = YES;

// Video grid thumbnail for video with no poster photo
MWPhoto *videoThumb = [MWPhoto new];
videoThumb.isVideo = YES;
In order to properly show the grid of thumbnails, you must ensure the property enableGrid is set to YES, and implement the following delegate method:
- (id <MWPhoto>)photoBrowser:(MWPhotoBrowser *)photoBrowser thumbPhotoAtIndex:(NSUInteger)index;The photo browser can also start on the grid by enabling the startOnGrid property.
By default, if the action button is visible then the image (and caption if it exists) are sent to a UIActivityViewController.
You can provide a custom action by implementing the following delegate method:
- (void)photoBrowser:(MWPhotoBrowser *)photoBrowser actionButtonPressedForPhotoAtIndex:(NSUInteger)index {
    // Do your thing!
}
Photo captions can be displayed simply by setting the caption property on specific photos:
MWPhoto *photo = [MWPhoto photoWithURL:[NSURL URLWithString:@"http://farm4.static.flickr.com/3629/3339128908_7aecabc34b.jpg"]];
photo.caption = @"Campervan";
No caption will be displayed if the caption property is not set.
By default, the caption is a simple black transparent view with a label displaying the photo's caption in white. If you want to implement your own caption view, follow these steps:
- Optionally use a subclass of
MWPhotofor your photos so you can store more data than a simple caption string. - Subclass
MWCaptionViewand override-setupCaptionand-sizeThatFits:(and any other UIView methods you see fit) to layout your own view and set it's size. More information on this can be found inMWCaptionView.h - Implement the
-photoBrowser:captionViewForPhotoAtIndex:MWPhotoBrowser delegate method (shown below).
Example delegate method for custom caption view:
- (MWCaptionView *)photoBrowser:(MWPhotoBrowser *)photoBrowser captionViewForPhotoAtIndex:(NSUInteger)index {
    MWPhoto *photo = [self.photos objectAtIndex:index];
    MyMWCaptionViewSubclass *captionView = [[MyMWCaptionViewSubclass alloc] initWithPhoto:photo];
    return captionView;
}The photo browser can display check boxes allowing the user to select one or more of the photos. To use this feature, simply enable the displaySelectionButtons property, and implement the following delegate methods:
- (BOOL)photoBrowser:(MWPhotoBrowser *)photoBrowser isPhotoSelectedAtIndex:(NSUInteger)index {
    return [[_selections objectAtIndex:index] boolValue];
}

- (void)photoBrowser:(MWPhotoBrowser *)photoBrowser photoAtIndex:(NSUInteger)index selectedChanged:(BOOL)selected {
    [_selections replaceObjectAtIndex:index withObject:[NSNumber numberWithBool:selected]];
}MWPhotoBrowser is available through CocoaPods. To install it, simply add the following line to your Podfile:
pod "MWPhotoBrowser"To run the example project, clone the repo, and run pod install from the Example directory first.
Then import the photo browser into your source files (or into your bridging header if you're using with Swift and not using frameworks with Cocoapods):
#import "MWPhotoBrowser.h"If you are using Swift and frameworks, then you can just import the browser into your Swift source file:
import MWPhotoBrowserMichael Waterfall, michael@d3i.com
MWPhotoBrowser is available under the MIT license. See the LICENSE file for more info.
Demo photos kindly provided by Oliver Waters.
