-
Notifications
You must be signed in to change notification settings - Fork 182
Using TortoiseGit with FHIR
For Windows users, TortoiseGit provides a Windows Shell Interface for git. This topic provides documentation for getting started committing to the FHIR spec with the TortoiseGit client.
First, download and install the latest TortoiseGit: https://tortoisegit.org/download/
Once you have the TortoiseGit client installed, you'll need to clone the FHIR repository locally. A clone is a local copy of the repository that you can use. Git is a distributed source control system, which means that each copy of the repository can manage its own set of changes.
NOTE: For SVN users that already have a local checkout, do not clone into that directory. Instead, create a new directory for the Git clone.
To clone the repository, first, copy the repository URL from the main page of the repository:
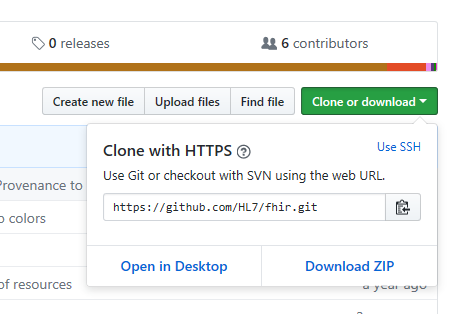
Next, decide where you want the repository locally, right-click on the folder you've chosen and select "Git Clone..." to display the Clone dialog:
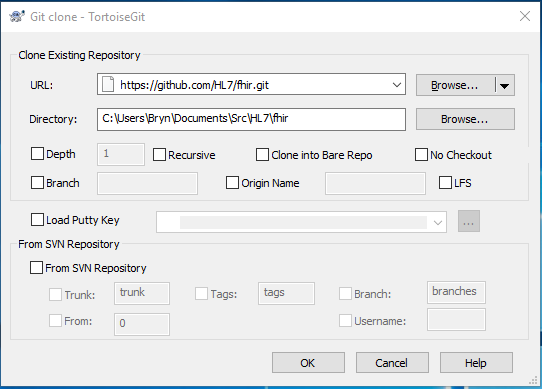
Note that this will create a sub-folder with the same name as the repository (fhir in this case), so if you've already created a folder called FHIR and that's where you're cloning, you'll end up with two FHIRs in your path. For example, to clone the repository above, I right-clicked on the "C:\Users\Bryn\Documents\Src\HL7" folder, and the repository will be cloned into a new sub-directory: "C:\Users\Bryn\Documents\Src\HL7\fhir".
Accept all the default options here and just click okay, and the TortoiseGit client will create the local clone.
Before starting changes, make sure you have the latest changes to the repository. Right click on the root repository folder and select "TortoiseGit|Pull...":
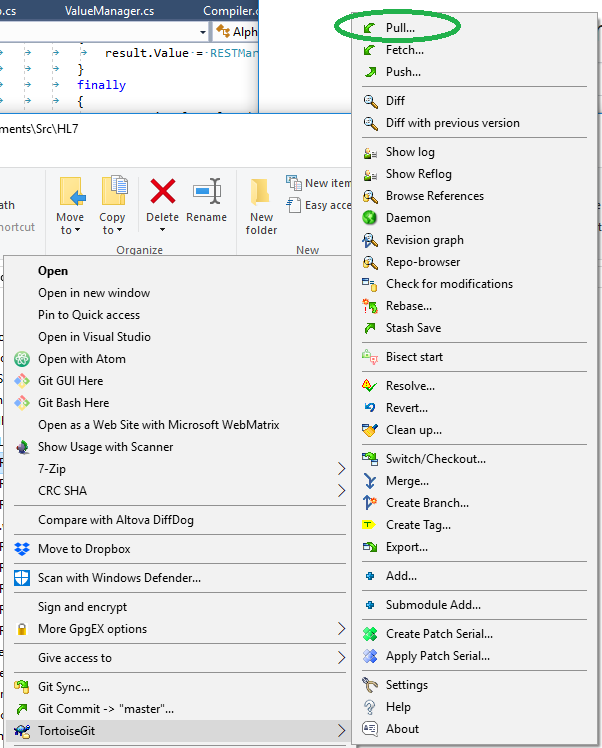
This will display the pull dialog:
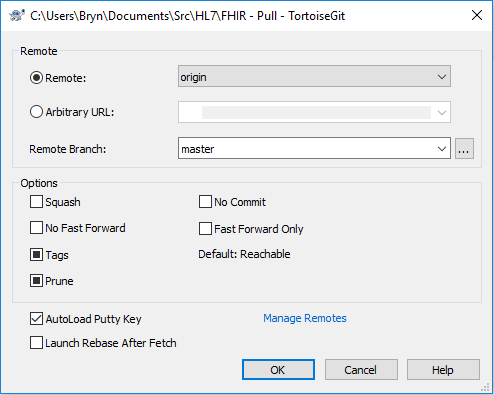
Accept the default options and click okay. This will display a progress dialog detailing the synchronization process. If you already have the latest, you'll see a message indicating you're up to date:
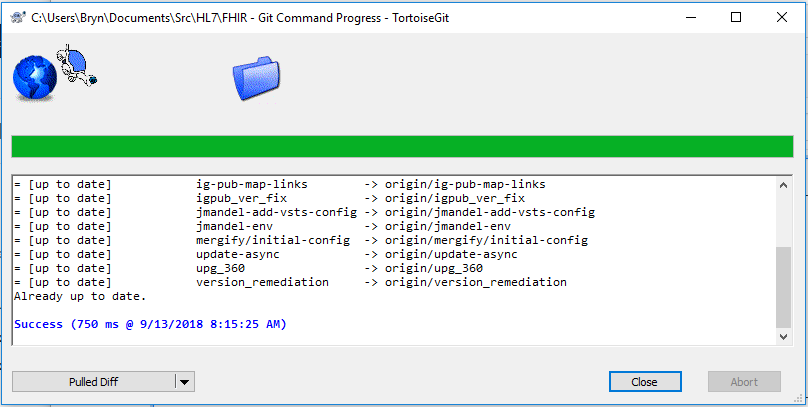
Once you have an up-to-date local copy, making changes to the spec involves:
- Creating a local "branch"
- Committing the changes to your local repository
- Pushing your changes to Github
- Creating a pull request
First, create a local branch with a descriptive name. Right click on the repository folder and select "Create branch...":
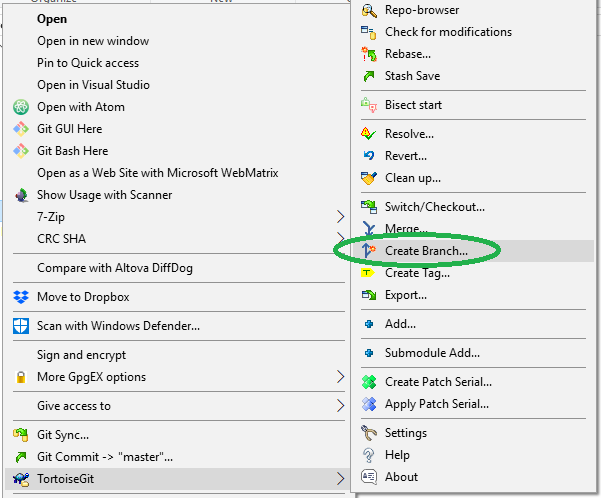
This will display the "Create branch dialog":
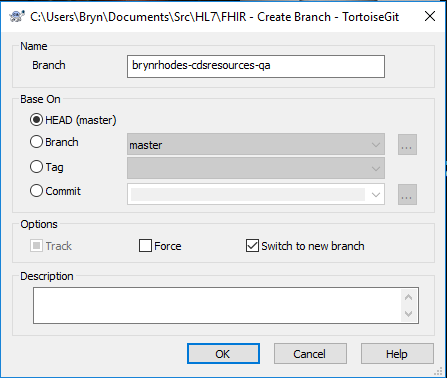
Enter the name of the branch, brynrhodes-cdsresources-qa in this case, and check the "Switch to new branch". Then click okay and you TortoiseGit will create the branch and switch to it:
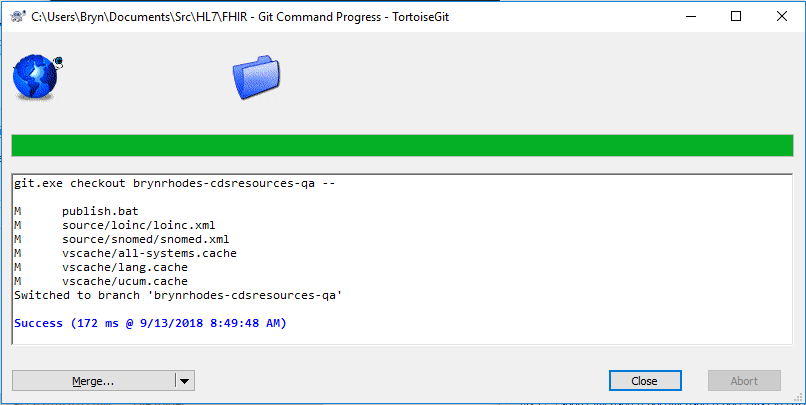
Note: Creating a branch in Git is a very lightweight operation, all it really does is remember where you were in the commit log when you created the branch.
Once you have made your local changes and verified that they build locally, you need to commit your changes to your local repository. Right click on the repository folder and select Git Commit -> "branch name", where "branch name" is the name of your feature branch:
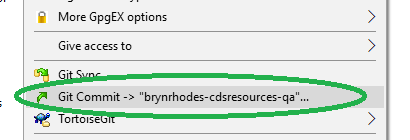
This will open the Commit dialog, showing a list of the files that you have changed in your working directory:
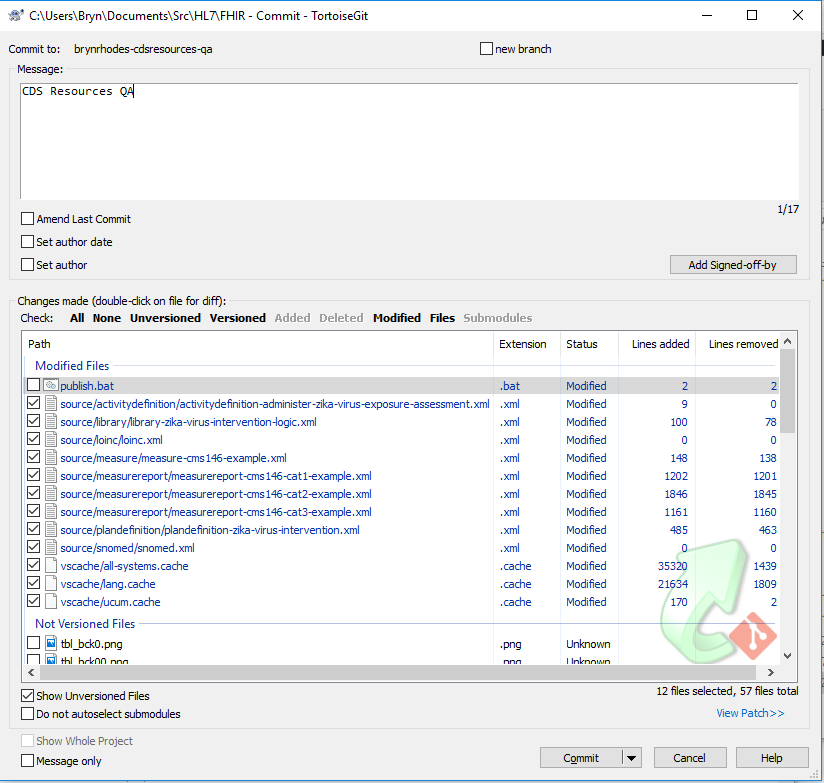
By default, any files that are modified will be selected. Add a commit message, typically starting with GF#XXXX: where XXXX is the number of a GForge tracker item that covers the change you are making. In this case, we're just making some QA updates, so there isn't an associated GForge tracker.
NOTE: The "Not Versioned Files" section lists files in your directory that aren't part of the repository. For example, if you've added a new file, you have to tell Git about it in order to include it in the commit. Make sure you include any files you've added, otherwise they won't be in the commit and they won't make it to the remote repository, usually resulting in a build failure.
Once you're happy with the commit, press the Commit button to start the commit process:
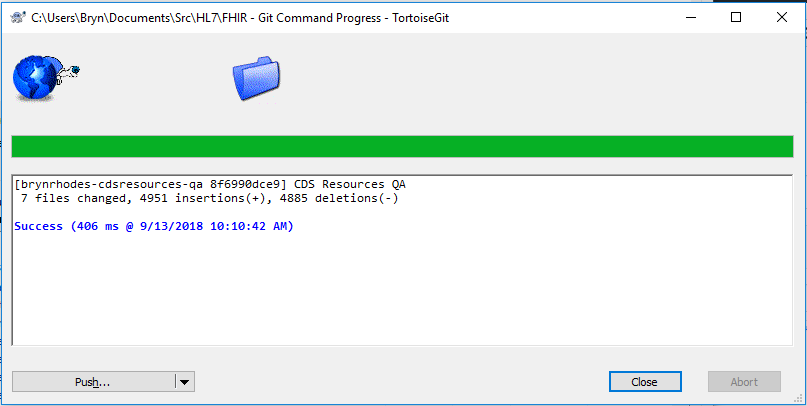
Once you've successfully committed your changes to your feature branch in your local repository, they need to be pushed to the remote repository. From a successful commit, you can start this process by selecting the "Push" button displayed in the above dialog, but you can also always execute a Push from the TortoiseGit right click menu. The Push dialog lets you choose what you want to push:
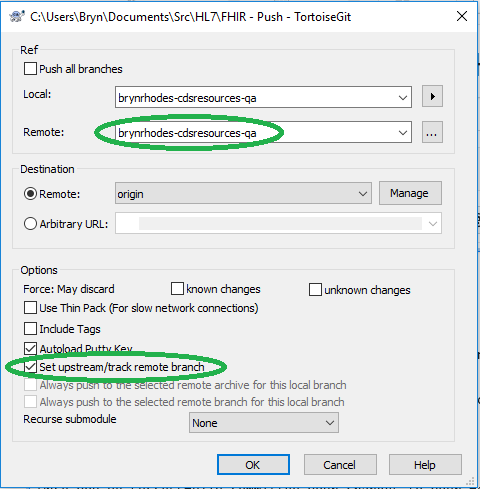
This dialog allows you to "push" changes from a local branch to a remote branch in the remote repository. Initially, the Remote: branch is empty (because this is a new feature branch that currently only exists in your local repository). What we want to do is create the same branch in the remote repository, so copy the name of your Local branch and paste it into the Remote branch. Also, be sure to check the "Set upstream/track remote branch" option, this tells Git that you want these two branches to be "the same", so that the next time you commit changes to this branch locally, Git will by default know where they should be pushed.
Leave the rest of the options set to their defaults and select OK to start the push:
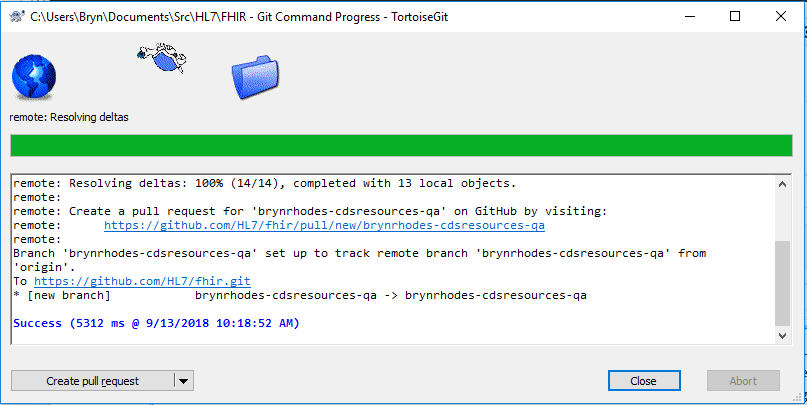
Once your feature branch is pushed to the remote repository, you'll need to submit a "Pull Request" (often shortened to just PR) in order to request that your changes be reviewed and merged into the master branch. Although you can do this with the TortoiseGit client, the GitHub user interface is a bit more user friendly, just navigate to the repository main page and look for the banner indicating the branch was just pushed:

Click the "Compare & pull request" button to create a pull request for your feature branch:
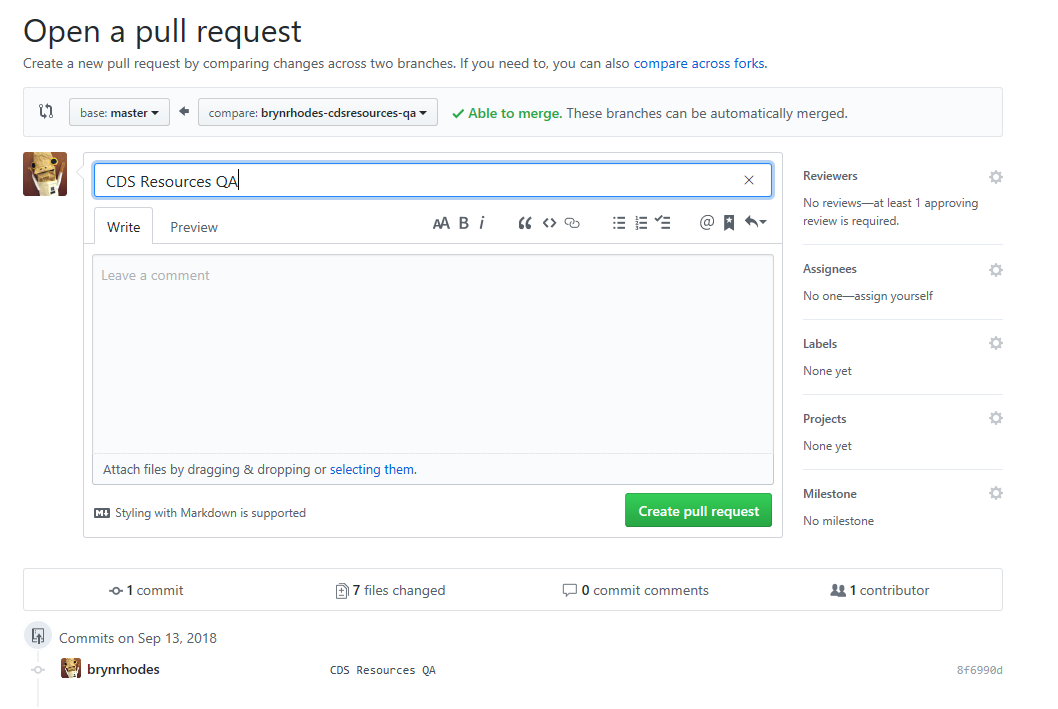
Click the "Create pull request" button and your pull request is submitted!
Once you've submitted a pull request, the change will be reviewed and merged into the master branch. Before making any additional changes, you'll need to switch back to the master branch. To switch, right click on the repository folder and select "TortoiseGit|Switch/Checkout..."
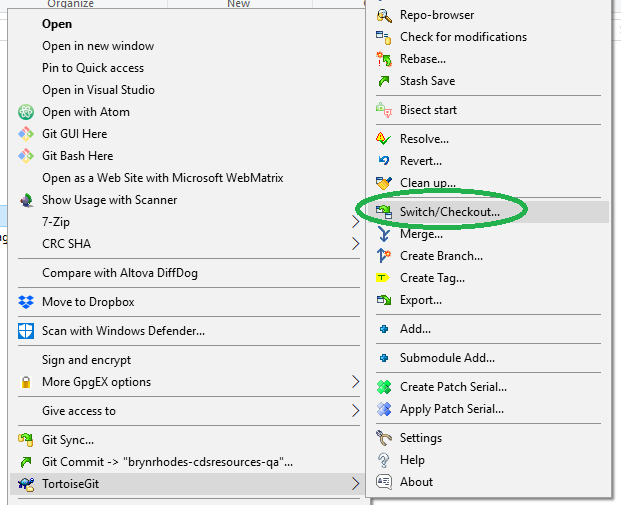
This will bring up the "Switch" dialog to let you choose the branch you want to switch to:
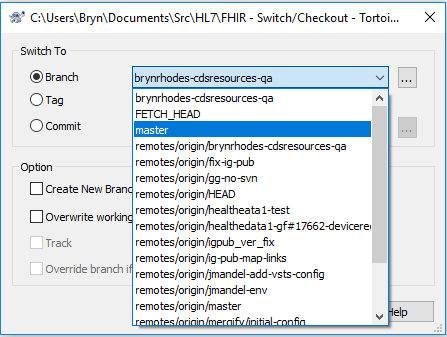
Select the master branch, leave the rest of the options as they are, and click OK:
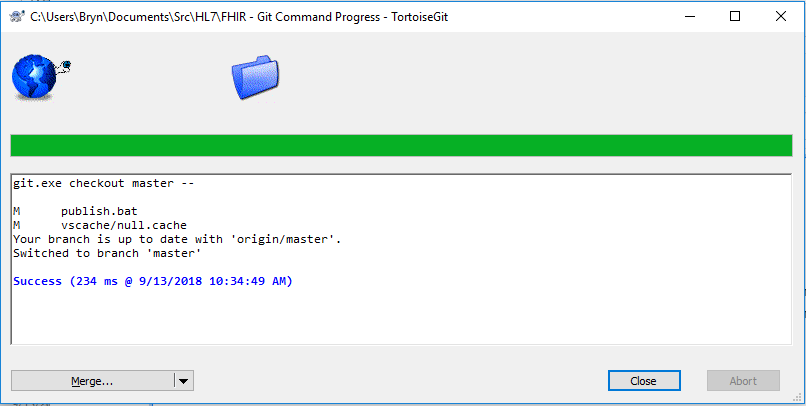
This "switches" you back to your local master branch.
NOTE: This means the changes you just made on your feature branch are no longer in your working directory, they are in a pull request that needs to be reviewed and merged into master. Once the change has been merged to the master branch, use "Pull" to get those changes into your local repository's master branch.