No coding necessary to complete this tutorial, just a GitHub account. You don’t need to use the command line, or install Git (the version control software GitHub is built on) unless you want to.
Tip: Open this guide in a separate browser window (or tab) so you can see it while you complete the steps in the tutorial.
Workshop slides located here.
Issues are used to track ideas, enhancements, tasks, or bugs for work on GitHub. Rubrik Build uses issues to collect user feedback, report software bugs, and organize tasks we'd like to accomplish within a repository. Issues can act as more than just a place to report software bugs. You can also watch an issue to receive notifications about the latest comments.
Take a look through the folder structure and find the .md file that corresponds to your city. For example if the workshop is taking place in New Orleans, then there should be a New-Orleans.md file located in the /North America/ directory. Note the sections for what to see/do and where to eat/drink; what is missing? Tell us by creating an issue!
To create an issue:
- Go to the Issues tab at the top of the repository. Select New Issue.
- Select Get started next to Bug Report to begin creating an issue. This will bring up an Issue template similar to the following image.
- Under Title type "Your name - Issue", for example
RFitzhugh - Issue. In the Write pane, describe the issue. For example:
The `New-Orleans.md` is missing Shaya under the "To Eat/Drink" section. This is an oversight because Shaya is a James Beard award winning restaurant serving delicious Mediterranean food.
Under Assignees, choose RoxieAtRubrik. Label should auto-populate as good first issue.
Rubrik Build uses a series of labels, two of which are particularly important to pay attention:
good first issue- indicates a good issue for first-time contributorshelp wanted- indicates that a maintainer wants help on an issue or pull request
Click Submit new issue.
You should now see this issue listed under the Issues tab.
A fork is a copy of a repository. Forking a repository allows you to freely experiment with changes without affecting the original project.
Most commonly, forks are used to either propose changes to someone else's project or to use someone else's project as a starting point for your own idea.
You will fork this repository to your account to make and propose changes.
To fork:
- At the top of the repository, click the Fork button.
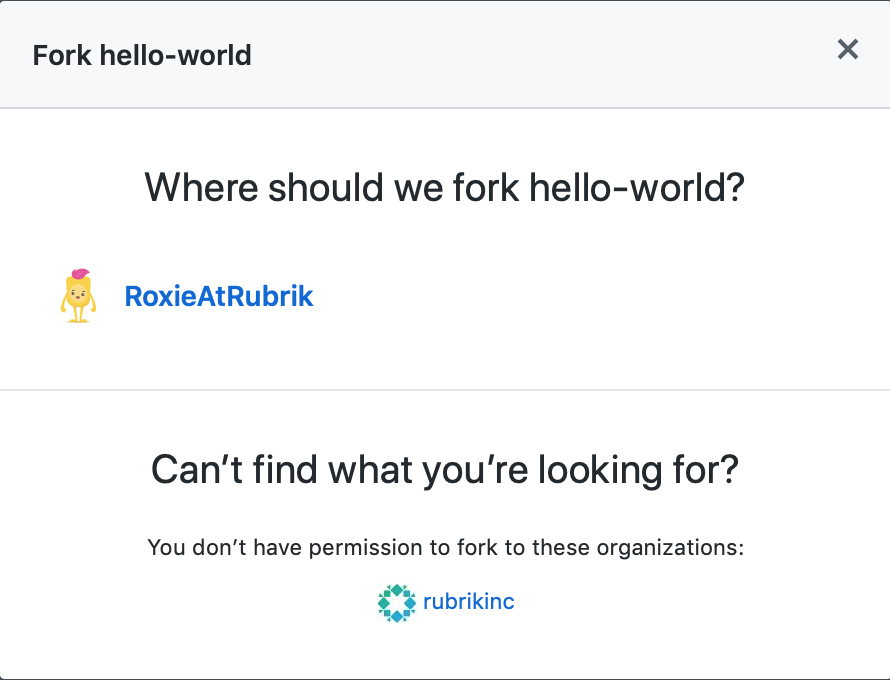
- A dialog will appear to confirm the fork, select your account.
You should now see this repository forked to your account and available for you to freely edit.
Branching is the way to work on different versions of a repository at one time.
By default your repository has one branch named master which is considered to be the definitive branch. We use branches to experiment and make edits before committing them to master.
When you create a branch off the master branch, you’re making a copy, or snapshot, of master as it was at that point in time. If someone else made changes to the master branch while you were working on your branch, you could pull in those updates.
Rubrik Build uses branches for keeping bug fixes and feature work separate from the master (production) branch. When a change is ready, a maintainer or admin will merge the branch into master.
To create a new branch:
- Go to your forked copy of the repository called
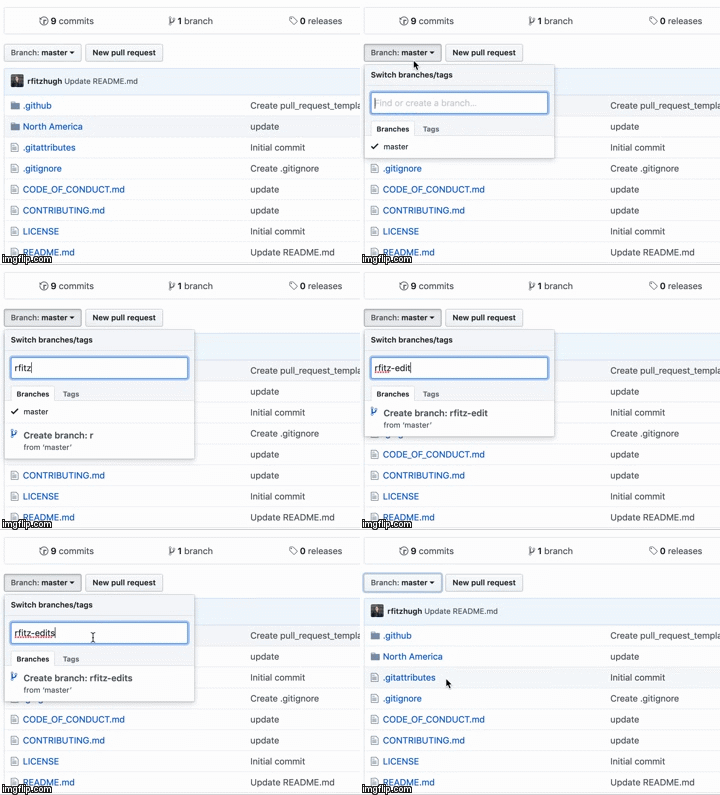
hello-world. - Click the drop down at the top of the file list that says branch: master.
- Type a branch name,
name-edits(i.e. rfitzhugh-edits), into the new branch text box. - Select the blue Create branch box or hit “Enter” on your keyboard.
Now you have two branches, master and name-edits. They look exactly the same, but not for long! Next we’ll add our changes to the new branch.
Bravo! Now, you’re on the code view for your name-edits branch, which is a copy of master. Let’s make some edits.
On GitHub, saved changes are called commits. Each commit has an associated commit message, which is a description explaining why a particular change was made. Commit messages capture the history of your changes, so other contributors can understand what you’ve done and why.
Make and commit changes:
- Navigate to the
.mdfile for your city. - Click the 📝 pencil icon in the upper right corner of the file view to edit.
- In the editor, add a new recommendation for the city.
- Write a commit message that describes your changes.
- Click Commit changes button.
These changes will be made to just the city .md file on your name-edits branch, so now this branch contains content that’s different from master. Time to merge into the master!
Nice edits! Now that you have changes in a branch off of master, you can open a pull request.
Pull Requests are the heart of collaboration on GitHub. When you open a pull request, you’re proposing your changes and requesting that someone review and pull in your contribution and merge them into their branch. Pull requests show diffs, or differences, of the content from both branches. The changes, additions, and subtractions are shown in green and red.
As soon as you make a commit, you can open a pull request and start a discussion, even before the code is finished.
By using GitHub’s @mention system in your pull request message, you can ask for feedback from specific people or teams, regardless of location.
You can even open pull requests in your own repository and merge them yourself. It’s a great way to learn the GitHub flow before working on larger projects.
Open a Pull Request for changes:
- Click the Pull Request tab, then from the Pull Request page, click the green New pull request button.
- In the Example Comparisons box, select the branch you made,
name-edits, to compare with master (the original).
-
Look over your changes in the diffs on the Compare page, make sure they’re what you want to submit.
-
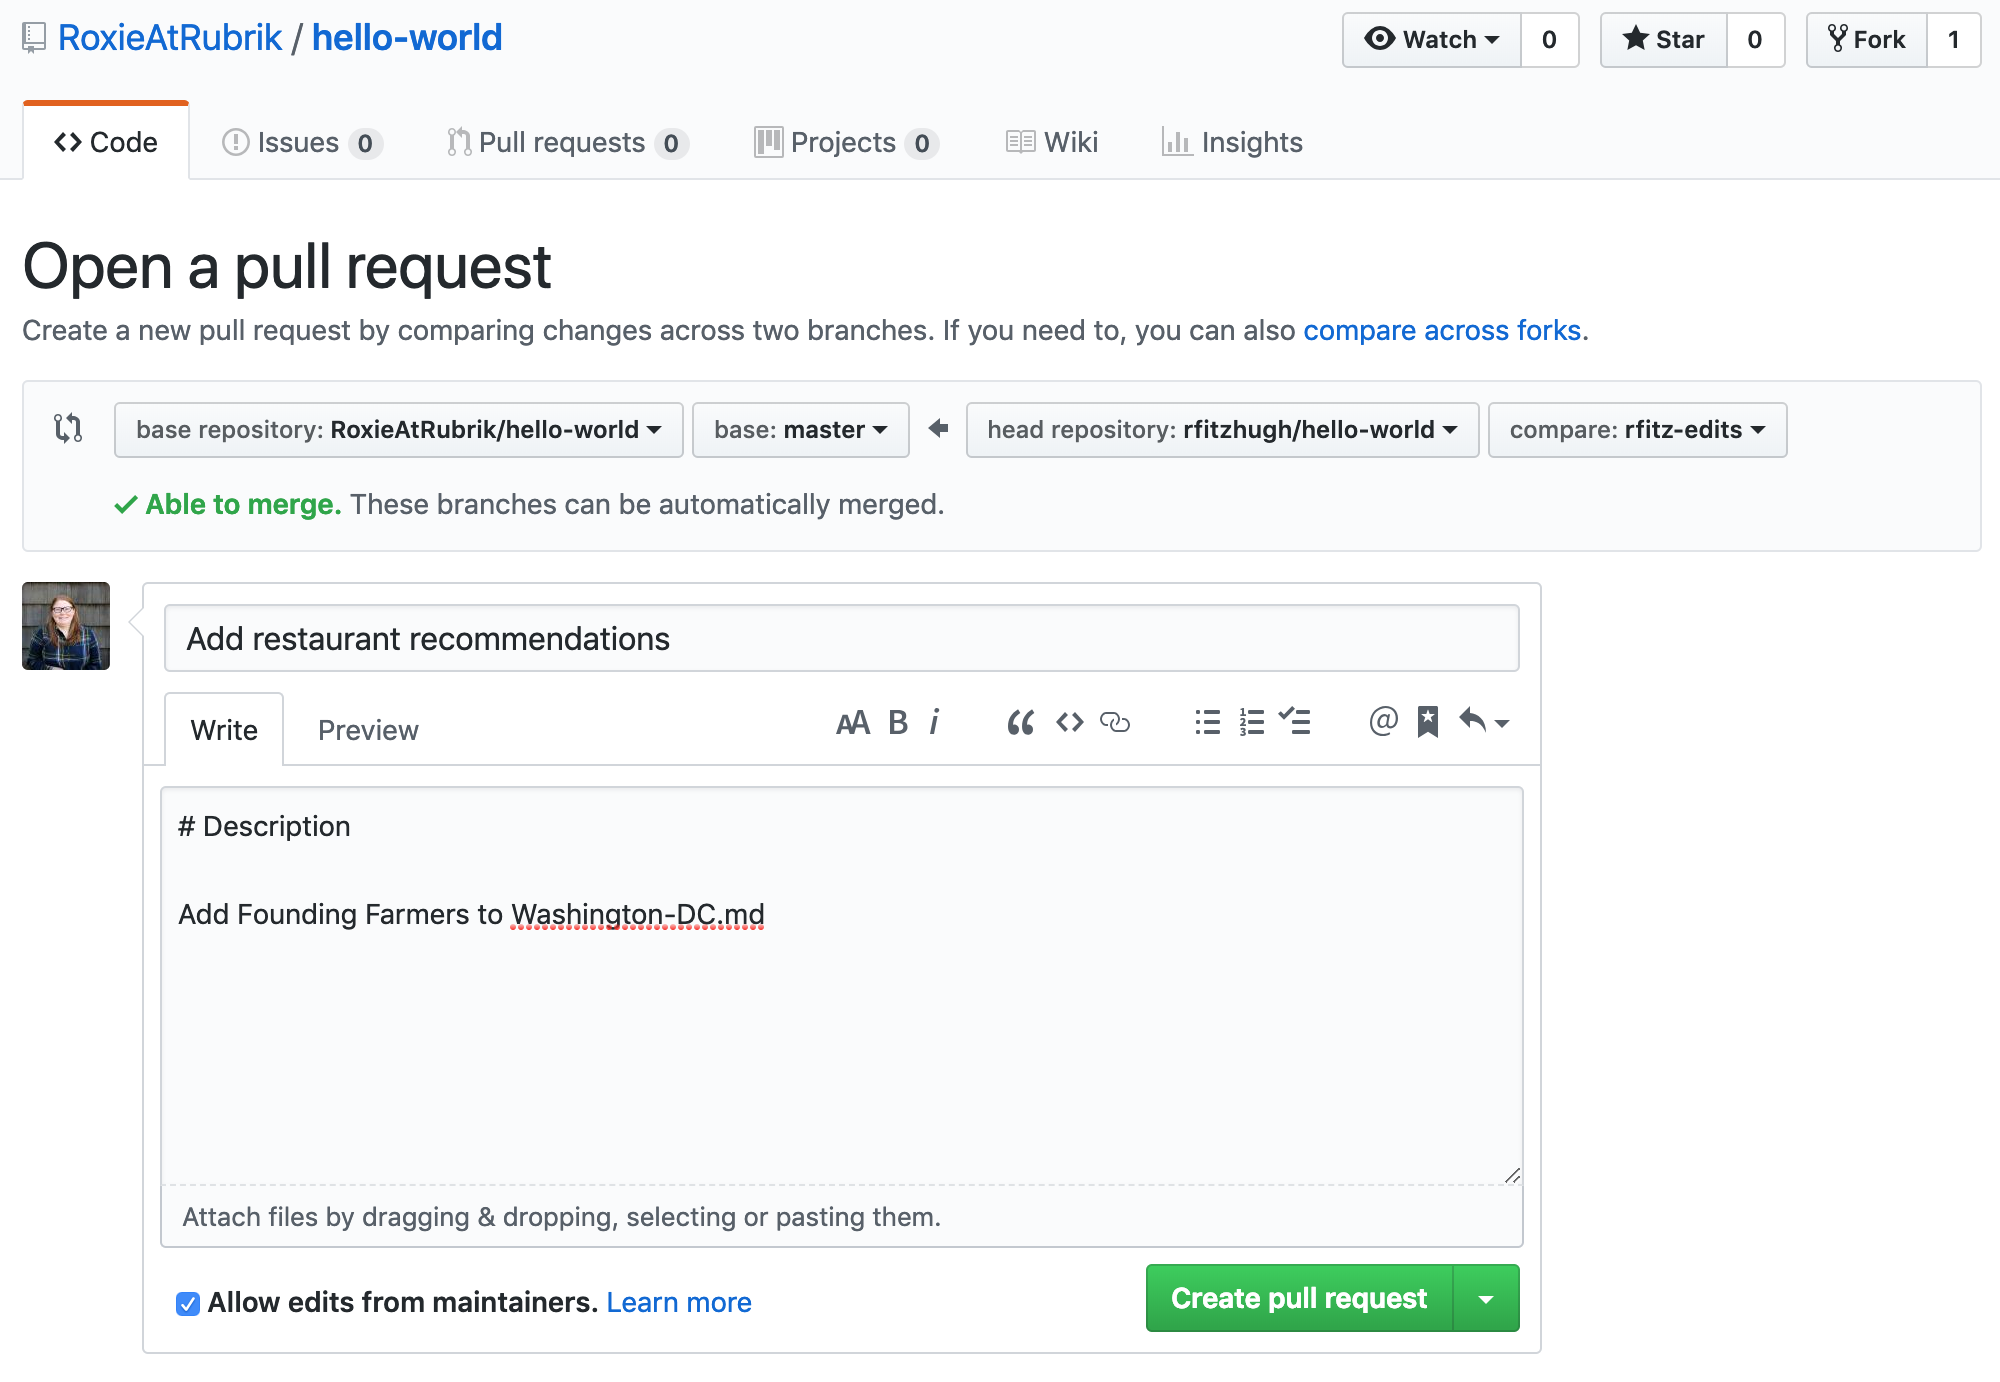
When you’re satisfied that these are the changes you want to submit, click the big green Create Pull Request button.
-
Give your pull request a title and write a brief description of your changes. When you’re done with your message, click Create pull request!
| Tip: You can use emoji and drag and drop images and gifs onto comments and Pull Requests. |
|---|
With proper access you will be able to merge your own branch. In this instance, a project maintainer is required to do the merge.
Celebrate! By completing this tutorial, you’ve learned to contribute to a project and make a pull request on GitHub!


