-
Notifications
You must be signed in to change notification settings - Fork 18
Buttons
See javadoc
<buttons actionCategory="SOME_CATEGORY"
    overflowMenuStyle="ActionSheet|PopupMenu|None"
    limit="MAX_ITEMS"
/>- actionCategory
-
An action category that will be used to populate the menu. It will look for actions in this category defined in the controller hierarchy.
- overflowMenuStyle
-
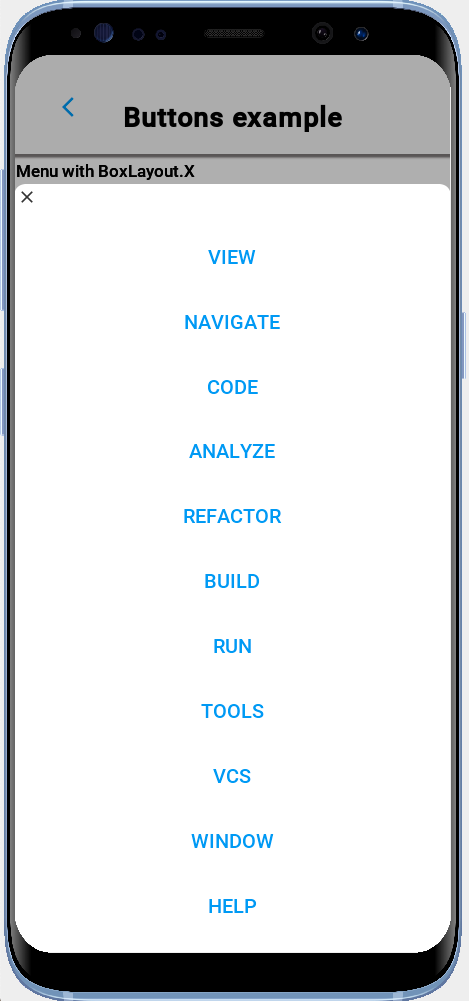
if the limit attribute is provided and greater than 0, this defines what to do with the actions in excess of the limit. Possible values are
ActionSheet(show actions in an action sheet),PopupMenu(show actions in a popup menu), andNone(just ignore the actions). Default value isActionSheet. - limit
-
An
intthe specifies the maximum number actions to include in this menu. If more actions than this are supplied, it will show the remainder according to theoverflowMenuStyleattribute settings.
|
Note
|
The <buttons> component extends AbstractEntityView so it also supports attributes defined there, and all superclasses.
|
|
Tip
|
You can use the layout attribute to specify a LayoutManager for the menu items. Default is BoxLayout.y().
|
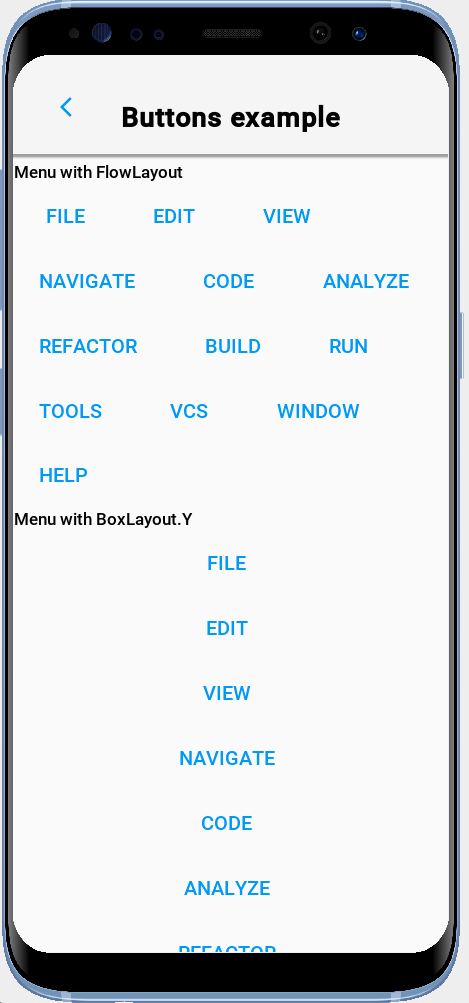
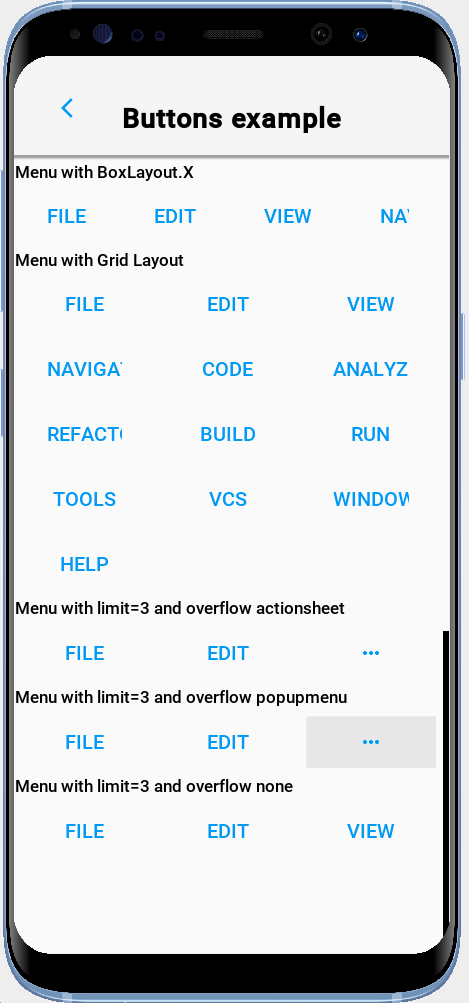
The following view defines an action category named BUTTONS_LIST. It then uses the <buttons> component with several different overflow and layout configurations.
<?xml version="1.0"?>
<y scrollableY="true" view-controller="com.codename1.rad.sampler.controllers.ButtonsSampleViewController"
        xsi:noNamespaceSchemaLocation="ButtonsSample.xsd" xmlns:xsi="http://www.w3.org/2001/XMLSchema-instance">
    <title>Buttons example</title>

    <!-- Define a category.  Actions are registered in this category in the controller
        class com.codename1.rad.sampler.controllers.ButtonsSampleViewController, then rendered
        in the various `<buttons>` components. -->
    <define-category name="BUTTONS_MENU"/>


    <label>Menu with FlowLayout</label>
    <buttons actionCategory="BUTTONS_MENU"/>

    <label>Menu with BoxLayout.Y</label>
    <buttons actionCategory="BUTTONS_MENU" layout="BoxLayout.y()"/>

    <label>Menu with BoxLayout.X</label>
    <buttons actionCategory="BUTTONS_MENU" layout="BoxLayout.x()"/>

    <label>Menu with Grid Layout</label>
    <buttons actionCategory="BUTTONS_MENU" layout="new GridLayout(3,3)"/>

    <spanLabel>Menu with limit=3 and overflow actionsheet</spanLabel>
    <buttons actionCategory="BUTTONS_MENU" layout="new GridLayout(3)" limit="3"/>

    <spanLabel>Menu with limit=3 and overflow popupmenu</spanLabel>
    <buttons actionCategory="BUTTONS_MENU" layout="new GridLayout(3)" limit="3" overflowMenuStyle="PopupMenu"/>

    <spanLabel>Menu with limit=3 and overflow none</spanLabel>
    <buttons actionCategory="BUTTONS_MENU" layout="new GridLayout(3,3)" limit="3" overflowMenuStyle="None"/>


</y>
The actions are added in the controller class:
package com.codename1.rad.sampler.controllers;

import com.codename1.rad.controllers.Controller;
import com.codename1.rad.controllers.ViewController;
import com.codename1.rad.nodes.ActionNode;
import com.codename1.rad.sampler.ButtonsSample;

public class ButtonsSampleViewController extends ViewController {
    /**
     * Creates a new ViewController with the given parent controller.
     *
     * @param parent
     */
    public ButtonsSampleViewController(Controller parent) {
        super(parent);
    }

    @Override
    protected void initControllerActions() {
        super.initControllerActions();
        for (String label : new String[]{"File", "Edit", "View", "Navigate", "Code", "Analyze", "Refactor", "Build", "Run", "Tools", "VCS", "Window", "Help"}) {
            ActionNode.builder()
                    .label(label)
                    .addToController(this, ButtonsSample.BUTTONS_MENU, evt -> {});

        }

    }
}

